





The Ultimate South African Flooring Guide: Part 9
Expansion Gaps: The 10mm Golden Rule Explained
When installing a new floor, understanding how the material behaves is critical. For floating floors like Laminate and SPC, there is one absolute, unbreakable law: Your floor must be allowed to move.
Because floating floors are not glued or nailed to the subfloor, they act as a single, continuous sheet that expands and contracts as one unit. While it is natural to want the planks to sit perfectly flush against your walls, skipping the expansion gap is the number one reason DIY flooring projects fail and warranties are instantly voided.
(Note: Glue-down LVT is the permanent exception. Because it is bonded directly to the subfloor, it does not shift as a single sheet and requires zero expansion gaps.)
1. The Science of Expansion: Why Gaps are Non-Negotiable
All floating flooring materials react dynamically to changes in their environment.
🪵 Wood-Based Cores (Laminate)
These materials naturally absorb and release moisture. In humid coastal summers, the HDF core acts like a sponge and expands. In dry Highveld winters, it contracts.
🪨 Rigid Cores (SPC Vinyl)
Even 100% waterproof SPC expands and contracts with temperature fluctuations, especially when exposed to direct afternoon sunlight through large windows.
⚠️ The Consequence for Floating Floors
If a floating floor is installed flush against a wall without an expansion gap, the pressure from expansion has nowhere to go. This leads to the planks lifting off the subfloor, buckling violently, or snapping the click-lock mechanisms.
2. Perimeter Gaps and Clearances
To accommodate natural movement, an expansion gap (empty space) must be left around the entire perimeter and all fixed objects.
- Laminate Gap Size: Standard required gap is usually 10mm to 12mm.
- SPC Vinyl Gap Size: Typically a minimum of 6mm to 12mm, depending on the manufacturer.
- Around Fixed Objects: You must leave a gap around plumbing pipes, structural columns, fireplace hearths, and sliding door tracks.
3. The Golden Rule: Never Pin the Floor (Heavy Furniture)
A floating floor must be allowed to "float." You should never install heavy, fixed cabinetry directly on top of a Laminate or SPC floor.
- The Problem: Installing heavy built-in wardrobes or kitchen islands over the flooring pins the planks down. This creates pressure points and restricts the floor's ability to move.
- The Solution: Fixed structures must be installed first. The flooring is then installed around the base, leaving the mandatory expansion gap.
4. Doorways and Maximum Run Lengths
You cannot run a floating floor endlessly. Stress builds up over large areas, making expansion joints mandatory.
- Maximum Run Lengths: Break the floor into independent sections roughly every 8 to 10 linear metres (check specific manufacturer specs).
- ⚠️ Exceeding the Limits: If you must exceed these limits, allow 1.5mm of gap for every running metre. Note: this usually voids the manufacturer's guarantee.
- At Doorways: Doorways are structural "pinch points." A gap inside the doorframe allows separate rooms to expand and contract independently.

T-Profile
5. Finishing the Gaps: Profiles and Skirtings
Trims and floor profiles cover gaps while maintaining structural integrity.
- Expansion Profiles (T-Mouldings): Bridge two sections of floor in doorways or massive open-plan rooms.
- Reducer Profiles: Bridge height differences when meeting lower surfaces like concrete or thin carpet.
- End Profiles: Cap edges against immovable surfaces like sliding glass doors.
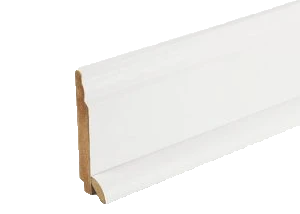
- Skirtings & Quarter Rounds: Installed directly to the wall (never the floor) to hover just above and hide the perimeter gap.

Reducer Profile
6. Kitchen & Wardrobe Kickplates: The Neatest Finish
💡 The Ultimate Seamless Finish: Remove and Reinstall

End Profile Cap
For the neatest finish around cabinets, remove kickplates (toe kicks) before installation.
- How It Works: Extend the flooring slightly under the cabinets (still leaving a gap against the legs).
- The Result: Trim the bottom of the kickplates and reinstall them on top of the new floor. This creates a flawless transition without beadings.
(Note: If kickplates are fixed, use matching quarter rounds pinned to the base of the kickplate to cover the gap).