


Laminate Flooring frequently asked questions
Q - What is Laminated Flooring
- Wear Layer: The top layer is a transparent, durable layer that resists scratching, staining, and fading. This layer helps protect the floor from everyday wear and tear.
- Design Layer: Under the wear layer is a high-resolution photographic image that gives the flooring its realistic look, whether it’s wood grain, stone, or tile pattern.
- Core Layer: The core layer provides stability and resilience, often made from high-density fiberboard (HDF) that can withstand impacts and adds thickness to the flooring.
- Backing Layer: The bottom layer provides additional stability and helps protect against moisture from the subfloor.
Laminated flooring is often chosen for its ease of installation, affordability, and low maintenance. It is typically installed using a click-lock system, making it a popular choice for DIY projects. However, it’s not as water-resistant as some other options like vinyl, so it’s best for areas where moisture is limited.
Q - Is Laminate Wood Flooring Water Proof, areas that it can be installed
Laminate wood flooring is generally not waterproof. While some modern laminate options are made with water-resistant materials and coatings, traditional laminate is still vulnerable to prolonged exposure to moisture. Excessive water can cause the fiberboard core to swell and warp, leading to damage that can’t easily be repaired.
Water-Resistant vs. Waterproof Laminate
Some laminate flooring brands now offer water-resistant or “waterproof” varieties that can handle minor spills or splashes without immediate damage. These usually have a tighter locking system, special coatings on the surface, and more water-resistant cores. However, even these enhanced types should not be fully submerged in water or exposed to standing water for long periods.
Suitable Installation Areas
Laminate wood flooring is ideal for:
- Living Rooms and Bedrooms: It’s durable, comfortable underfoot, and has a realistic wood appearance that complements home aesthetics.
- Home Offices: Adds a professional, polished look.
- Dining Rooms: Works well as long as spills are quickly cleaned.
Unsuitable or Cautious Areas
- Kitchens: It can be installed here if you use water-resistant laminate and immediately clean up spills. However, traditional laminate may still absorb moisture over time.
- Bathrooms: Not ideal due to high moisture levels. Even water-resistant laminate may not hold up over time in areas with frequent splashing or humidity.
- Laundry Rooms: Washing machines can leak, making it risky for laminate flooring. High humidity and potential spills make this area unsuitable.
If you’re looking for a truly waterproof solution for high-moisture areas, consider vinyl plank flooring or tiles that offer similar aesthetics with better water resistance.
Q - Do Laminate Flooring require underlay
Yes, laminate flooring typically requires an underlay, which is a thin layer of material placed between the laminate planks and the subfloor. The underlay serves several important purposes that enhance the performance and comfort of the laminate flooring:
Reasons for Using Underlay with Laminate Flooring
Sound Absorption: Laminate can be noisy to walk on, especially in high-traffic areas. Underlay helps reduce footstep sounds and minimizes echo.
Moisture Barrier: In areas prone to moisture, such as basements, underlay with a built-in moisture barrier helps protect the laminate from absorbing moisture from the subfloor, which could cause warping and damage.
Floor Leveling: Underlay helps smooth out minor imperfections in the subfloor, providing a more even surface for the laminate planks. This can make the floor more comfortable and stable.
Thermal Insulation: Underlay provides an extra layer of insulation, which can make laminate floors feel warmer underfoot, especially in cooler climates or rooms.
Comfort: The underlay adds a slight cushion, making the floor feel softer and more comfortable to walk on.
Types of Underlay for Laminate Flooring
- Standard Foam Underlay: Suitable for rooms without moisture concerns, such as living rooms and bedrooms.
- Moisture-Resistant Underlay: Ideal for areas like basements or on concrete subfloors where moisture might be a concern.
- Thermal or Insulating Underlay: Provides added warmth and sound insulation, often used in colder climates.
- Combination Underlay: Some underlays combine moisture resistance, soundproofing, and insulation for all-around performance.
While some laminate flooring options come with a pre-attached underlay layer, separate underlay is often recommended for added durability and comfort
Q - DIY Product - Is Laminated flooring easy to install
Yes, laminate flooring is considered one of the easiest flooring types for DIY installation. Most laminate flooring uses a click-lock or tongue-and-groove system, where planks snap together without the need for nails, glue, or other adhesives. Here are some reasons why it’s DIY-friendly and tips to make the process easier:
Why Laminate Flooring is Easy to Install
Floating Floor System: Laminate is usually installed as a “floating floor,” meaning it doesn’t need to be attached to the subfloor. This simplifies installation and allows you to install it over most existing floors, as long as the surface is even.
Minimal Tools Required: Basic tools like a tape measure, spacers, a saw (or laminate cutter), a tapping block, and a pull bar are generally all you need. These tools are commonly available at hardware stores or rental centers.
Simple Click-Lock Mechanism: With the click-lock system, you angle one plank into the other, press down, and it “clicks” into place. This system is forgiving for first-time installers, as planks can usually be adjusted and repositioned before locking fully into place.
Typical Installation Time
A single room (about 20 square meters) can usually be installed in a day or less, even for beginners. Experienced DIYers may complete it even faster.
Q - Do Laminated Wood get secured to the Sub Floor, what is a floating floor
No, laminated wood flooring is not secured to the subfloor; it is typically installed as a floating floor. Here’s what that means and how it works:
What is a Floating Floor?
A floating floor refers to a flooring installation method where the planks or tiles are not glued, nailed, or otherwise attached to the subfloor. Instead, the flooring “floats” above the subfloor, held in place by the weight of the planks, the interlocking design, and often, the perimeter of the room’s walls.
How Floating Floors Work with Laminate Flooring
Laminate flooring is one of the most popular types of floating floors due to its click-lock or tongue-and-groove system. This system allows each plank to snap or lock into the next plank, creating a secure and stable surface without the need for adhesives or fasteners.
Benefits of a Floating Floor System
Easy Installation: Because no nails or glue are involved, floating floors are quicker and easier to install, making them ideal for DIY projects.
Versatile Installation Locations: Floating floors can be installed over various subfloors, including concrete, plywood, and even some existing floors, provided they are level and in good condition.
Expansion and Contraction: Laminate flooring naturally expands and contracts with changes in temperature and humidity. The floating design, along with an expansion gap around the room’s perimeter, allows the floor to move slightly without buckling or warping.
Easier Replacement: If a plank is damaged, it’s easier to replace individual planks in a floating system than with glued or nailed-down flooring.
Q - Why do Laminate Flooring need expansion and where
Laminate flooring needs expansion gaps because it naturally expands and contracts with changes in temperature and humidity. These gaps allow the floor to shift slightly without buckling, warping, or creating pressure points that could damage the flooring.
Why Laminate Flooring Needs Expansion Gaps
Laminate flooring naturally expands and contracts with changes in temperature and humidity. This movement requires expansion gaps to prevent issues such as buckling, warping, or lifting, which could damage the flooring.
Where to Place Expansion Gaps
Expansion gaps should be placed around the entire perimeter of the room and around fixed structures. Here’s a breakdown of where to add these gaps:
Along Walls: Maintain a gap (usually about 10 mm, but always follow the specific manufacturer’s recommendation) between the edge of the laminate planks and the walls. Use spacers during installation to ensure a consistent gap.
Around Fixed Objects: Leave expansion gaps around any immovable fixtures like door frames, built-in cabinets, kitchen islands, and columns. This allows the flooring to expand and contract freely without pressure points.
Transitions to Other Flooring Types: Where laminate meets other flooring types, such as tile, carpet, or hardwood, an expansion gap is necessary. Transition profiles or strips should be used to allow independent movement for each type of flooring.
Covering the Expansion Gaps
After the floor is installed, these expansion gaps are typically covered with skirtings, quarter rounds, and profiles:
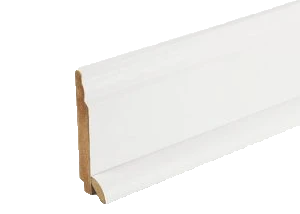
Skirtings: Skirtings (also known as baseboards) are placed along the walls to hide the expansion gap around the room’s perimeter. They provide a clean, finished look while allowing the laminate floor room to expand beneath them.
Quarter Rounds: Quarter rounds are small, rounded moldings that can be installed at the base of the skirting to cover any remaining gaps between the skirting and the flooring. Quarter rounds offer additional coverage and are often used for aesthetic finishing.
Profiles (Transition Strips): Use transition profiles where laminate meets another type of flooring. These profiles, such as T-moldings, reducer profiles, and end caps, help maintain a seamless transition between different flooring types while allowing for expansion. Different profiles are used depending on the height difference and style of the adjoining floor.
Importance of Following Manufacturer Installation Specifications
Each laminate flooring brand may have specific requirements for expansion gaps, underlay, and the installation of skirtings, quarter rounds, and profiles. Following these manufacturer specifications is crucial for:
- Ensuring Floor Stability: Correct installation per manufacturer guidelines ensures that the flooring will remain stable and perform well over time.
- Warranty Compliance: Most manufacturers require installation to follow their specifications to maintain warranty coverage. Incorrectly installed floors may void the warranty.
- Aesthetic Finish: Following guidelines helps achieve a polished look with properly aligned skirtings, quarter rounds, and profiles that complement the flooring.
Final Note
Expansion gaps, skirtings, quarter rounds, and profiles work together to allow natural movement in laminate flooring while maintaining an attractive, finished look. Proper installation, as recommended by the manufacturer, will enhance both the performance and appearance of the floor.
Q - What is the difference between Laminate and Vinyl Flooring
Laminate and vinyl flooring are both popular choices for residential and commercial spaces, offering affordability, durability, and ease of installation. However, they differ significantly in their material composition, water resistance, durability, comfort, insulation properties, and ideal installation areas. Here’s a detailed comparison:
1. Material Composition
- Laminate Flooring: Made primarily from high-density fiberboard (HDF) with a photographic image layer that mimics wood, stone, or other materials, topped with a clear, protective wear layer.
- Vinyl Flooring: Composed of multiple layers of synthetic materials, including a waterproof core and a wear layer. Luxury vinyl plank (LVP) and luxury vinyl tile (LVT) have a design layer that replicates the look of wood or stone.
2. Water Resistance
- Laminate: Traditional laminate is water-resistant but not waterproof. Its HDF core can swell and warp if exposed to excessive moisture over time. Some newer laminates offer enhanced water resistance but should still be limited in high-moisture areas.
- Vinyl: Vinyl flooring is fully waterproof, making it an ideal choice for areas with high moisture, such as bathrooms, kitchens, laundry rooms, and basements. Its synthetic composition ensures it won’t swell or warp when exposed to water.
3. Durability and Scratch Resistance
- Laminate: Laminate is known for being scratch-resistant, making it suitable for areas with moderate foot traffic and homes with pets. However, it can be more prone to chipping if heavy items are dropped on it and may not handle impacts as well as vinyl.
- Vinyl: Vinyl is generally more impact-resistant than laminate and can withstand heavy use and drops without damage. It also offers good scratch resistance, especially with thicker wear layers found in high-quality LVP and LVT.
4. Comfort and Sound
- Laminate: Has a harder, more rigid feel underfoot due to its fiberboard core. Laminate tends to be louder when walked on, but using an underlay can improve comfort and reduce noise.
- Vinyl: Vinyl has a softer and more flexible feel, especially if it has a cushioned backing or attached underlay. It is quieter than laminate, making it suitable for multi-level homes or rooms where sound control is a concern.
5. Insulation Properties
- Laminate: Offers better thermal insulation than vinyl due to its thicker, wood-based core. This can make it feel warmer underfoot, especially in cooler climates or rooms with less natural heat. When paired with the right underlay, laminate can add even more insulation, making rooms more energy efficient.
- Vinyl: Has less natural insulation compared to laminate, as it is thinner and made from synthetic materials. It can feel colder underfoot, particularly in rooms that are not heated. However, vinyl can be installed with an insulating underlay to improve warmth and comfort.
6. Appearance and Realism
- Laminate: Known for its highly realistic wood appearance due to the photographic layer that can replicate the intricate details of wood grain. It’s a great choice if you want the look of hardwood at a lower price.
- Vinyl: Vinyl has come a long way in replicating the appearance of natural materials. LVP and LVT offer realistic wood and stone visuals, but some styles may have a slightly less natural look compared to high-end laminates. However, high-quality vinyl options can closely mimic the textures and patterns of natural materials.
7. Installation
- Laminate: Typically installed as a floating floor with a click-lock system. This makes it easy to install as a DIY project. Laminate often requires an underlay, which should be chosen based on the manufacturer’s specifications.
- Vinyl: Vinyl planks and tiles can be installed as a floating floor using a click-lock system or glued down, depending on the type. Floating installations are more DIY-friendly, while glue-down methods are often used in commercial spaces or for areas with high moisture.
8. Ideal Areas for Use
- Laminate: Best for dry areas like living rooms, bedrooms, hallways, and home offices. It’s not recommended for areas with high moisture, such as bathrooms or laundry rooms, unless using a water-resistant variety.
- Vinyl: Suitable for any room, including moisture-prone areas like bathrooms, kitchens, basements, and laundry rooms. Its waterproof nature makes it a versatile choice throughout the home.
9. Cost
- Both laminate and vinyl flooring are generally affordable compared to hardwood or tile. Prices vary based on quality, thickness, and design, with some high-end vinyl options costing more than laminate. However, both offer great value for homeowners looking for an attractive and durable floor.
Summary Table
| Feature | Laminate Flooring | Vinyl Flooring |
|---|---|---|
| Material Composition | High-density fiberboard, photographic layer | Synthetic, waterproof core, design layer |
| Water Resistance | Water-resistant (limited); not waterproof | Fully waterproof |
| Durability | Scratch-resistant but can chip | High durability, impact-resistant |
| Comfort | Harder, louder underfoot | Softer, quieter, absorbs sound better |
| Insulation | Better thermal insulation, feels warmer | Less natural insulation, can feel cooler |
| Appearance | Highly realistic wood look | Realistic wood/stone look, slightly less texture |
| Installation | Floating, click-lock; needs underlay | Floating, click-lock, or glue-down |
| Ideal Areas | Living rooms, bedrooms, dry areas | Bathrooms, kitchens, laundry rooms, basements |
Final Note
Choosing between laminate and vinyl flooring depends on your needs for water resistance, comfort, insulation, and appearance. Laminate is ideal if you want the realistic look of wood in dry areas with better insulation properties. Vinyl is better suited for high-moisture rooms or areas with heavy traffic, thanks to its waterproof nature and durability.
Q - How do Laminate Floors lock together, what is click lock systems
Laminate floors use a click-lock system to lock together, allowing for an easy and secure installation without the need for glue, nails, or staples. This system is one of the reasons laminate flooring is so popular for DIY installations. Here’s an overview of how it works and what a click-lock system entails:
How Click-Lock Systems Work in Laminate Flooring
In a click-lock system, each plank of laminate flooring has interlocking edges that snap or “click” together when positioned correctly. The planks fit together securely, forming a floating floor that doesn’t need to be attached to the subfloor. Here’s a step-by-step breakdown of the process:
Tongue and Groove Design: Each laminate plank has a tongue (a protruding edge) and a groove (a recessed edge). These edges are precisely cut to fit together. When you place the tongue of one plank into the groove of the next plank at an angle and push down, the pieces snap into place, creating a seamless joint.
Angling and Locking: To install, you angle one plank into the groove of the previous plank, then press down to snap it into place. Some systems require you to push firmly to ensure the lock is engaged, while others may require a slight tap with a tapping block for a tight fit.
Floating Floor: Because the click-lock system is not attached to the subfloor, the planks form a floating floor that “floats” above the subfloor. This allows the floor to expand and contract naturally with temperature and humidity changes without buckling.
Types of Click-Lock Systems
There are a few variations of the click-lock mechanism, each with slightly different installation techniques:
- Angle-Tap: With this method, you angle the plank into the groove, then tap it lightly to secure the lock. This method often requires a tapping block to ensure a snug fit.
- Angle-Angle: Here, you angle each plank to lock the sides together and then lower it down to lock into the adjacent plank. This technique is common in DIY-friendly laminates.
- Drop-Lock: In this system, the plank is simply pressed down on top of the previous plank, “dropping” into place with a locking mechanism on the long side. This is often the easiest type for beginners to install.
Benefits of Click-Lock Systems
- Easy Installation: Click-lock systems don’t require adhesive or nails, making installation faster and cleaner. It’s ideal for DIY projects.
- Reusable Planks: Because there’s no adhesive, you can uninstall the flooring if needed and reuse the planks, which can be beneficial for temporary spaces.
- Expansion-Friendly: The floating floor design allows for natural expansion and contraction with temperature and humidity changes, reducing the risk of buckling.
- Durable Connection: Once the planks are locked together, they create a stable, continuous surface that resists shifting and movement.
Key Considerations
While the click-lock system makes laminate installation straightforward, it’s essential to follow manufacturer instructions closely. The type of click-lock system, the angle needed, and whether tapping is required can vary between brands.
Final Note
The click-lock system is a key feature that makes laminate floors quick and easy to install, even for beginners. With precise alignment and attention to detail, you can achieve a professional-looking, durable floor that’s ready for use almost immediately after installation.
Q - Do I need to acclimatise Laminate Flooring before installation
Yes, it’s important to acclimatize laminate flooring before installation. This process allows the laminate planks to adjust to the temperature and humidity of the room, reducing the risk of expansion, contraction, or warping after installation.
Why Acclimatize Laminate Flooring?
Laminate flooring is made with a high-density fiberboard (HDF) core, which is sensitive to changes in humidity and temperature. If the planks are installed immediately after being brought in from a different environment, they may expand or contract once they acclimate to the room’s conditions. This movement could lead to gaps, buckling, or other installation issues.
How to Acclimatize Laminate Flooring
Bring the Boxes into the Room: Place the unopened boxes of laminate in the room where they will be installed. Keep them flat on the floor rather than stacked upright, allowing air to circulate around them.
Timing: Allow the flooring to acclimate for at least 48 hours before installation. In areas with significant humidity differences (e.g., if the flooring was stored in a very dry warehouse), you might need up to 72 hours.
Maintain Consistent Room Conditions: During the acclimation period, keep the room at a stable temperature (ideally between 18-25°C) and a humidity level of 45-65%. Avoid exposing the flooring to direct sunlight or moisture, as this could interfere with acclimatization.
Open the Boxes (Optional): For faster acclimatization, some installers open the boxes and lay out the planks in small stacks. Check the manufacturer’s instructions, as some brands specify whether the flooring should remain sealed or can be unboxed.
Benefits of Acclimatizing Laminate Flooring
- Reduces Expansion and Contraction: Proper acclimation helps minimize the natural expansion and contraction of the planks after installation, preventing gaps or buckling.
- Improves Installation Stability: When acclimated, laminate planks are more stable, ensuring a smooth, level installation that will last.
- Protects Warranty: Many manufacturers require acclimatization as part of the installation process. Skipping this step could void the flooring’s warranty.
Final Note
Acclimatizing laminate flooring is an essential step that ensures a stable, long-lasting installation. By following this process, you’ll help the flooring settle into the room’s conditions, reducing future issues and achieving a beautiful, durable finish
Q - Do Laminate flooring planks need to be staggered installed
Yes, laminate flooring planks should be staggered during installation. Staggering the planks helps create a more stable floor and gives it a more natural, professional look. Here’s why and how to stagger laminate flooring correctly:
Why Stagger Laminate Flooring Planks?
Increased Stability: Staggered joints prevent the planks from aligning in a single row, which would make the floor weaker and prone to separation or buckling. Staggering distributes the joints evenly, providing structural stability across the entire floor.
Aesthetic Appeal: Staggering the planks gives the floor a more natural and visually pleasing appearance, mimicking the look of real wood or stone. A random or alternating pattern prevents a repetitive or “grid-like” appearance.
Minimizes Joint Weakness: When joints are staggered, each row reinforces the row next to it, which helps keep the floor intact even with daily movement and shifting.
How to Stagger Laminate Flooring Planks
Offset Each Row: Begin each new row by offsetting the end joints of the planks from the previous row. Typically, you want at least a 20-30 cm offset between rows. This creates a natural, staggered look and enhances the floor’s strength.
Avoid Patterns: For a more natural appearance, avoid a predictable pattern (like a “H” pattern or consistent repeating joints). Instead, vary the starting lengths of each row. This creates a more random, organic look.
Cut Planks as Needed: If needed, cut the first plank of each row to achieve the desired offset. For example, if your full plank length is 120 cm, start with a 90 cm piece for one row, a 60 cm piece for the next, and so on. Save the offcuts to use as starter pieces for other rows if they’re long enough.
Follow Manufacturer Guidelines: Some manufacturers may recommend a specific stagger pattern or minimum offset distance. Always check their installation instructions to ensure warranty compliance and achieve the best results.
Tips for Staggered Installation
- Measure and Plan: Before cutting, measure the space to ensure each plank fits properly and the stagger is even.
- Mix Planks from Different Boxes: To avoid color or pattern repetition, mix planks from different boxes. This helps create a natural variation.
- Use Spacers: To maintain expansion gaps along the walls, place spacers at the edges during installation.
Final Note
Staggering laminate planks is essential for a stable, professional-looking floor. By offsetting the joints and avoiding a repetitive pattern, you’ll achieve a more durable and visually appealing laminate floor that stands the test of time
Q - Do I need to allow for cutting wastage when ordering my laminate floor
Yes, it’s important to allow for cutting wastage when ordering laminate flooring. When installing laminate, there will almost always be some material lost due to cutting, trimming, and fitting around obstacles. Factoring in a little extra helps ensure you have enough flooring to complete the project without running out.
How Much Extra to Order
A good rule of thumb is to add 5-10% extra to your total square meterage:
- 5% for simple rooms: For rooms that are square or rectangular with minimal cuts (e.g., no complex corners or obstacles), adding 5% extra should be sufficient.
- 10% for complex rooms: For rooms with a lot of corners, doorways, closets, or other obstacles that require more cutting, it’s wise to add closer to 10% extra.
Why You Need Extra Flooring
Cuts and Offcuts: Each time you cut a plank to fit along a wall or around an obstacle, you may end up with offcuts that can’t be used elsewhere. Even with careful planning, some pieces won’t be usable for other rows.
Staggered Installation: Because laminate flooring should be installed with staggered joints, you’ll need to cut planks to achieve the necessary offsets. This staggering often leads to offcuts that add to wastage.
Mistakes and Replacements: Mistakes during cutting or installation happen, especially in DIY projects. Having extra planks on hand allows for a buffer if you need to replace any damaged or incorrectly cut pieces.
Future Repairs: Ordering a bit extra means you’ll have spare planks on hand in case of future damage. Manufacturers may discontinue styles or colors over time, so having spare planks ensures you can match your existing floor if repairs are needed.
How to Calculate Total Square Meterage with Wastage
Measure the Room: Multiply the room’s length by its width to get the total square meterage.
Add Wastage: Multiply the total square meterage by 1.05 or 1.10 (for 5% or 10% wastage). For example, if your room is 20 square meters:
- 5% Wastage: 20 × 1.05 = 21 square meters
- 10% Wastage: 20 × 1.10 = 22 square meters
Order Based on Your Final Total: Use this final figure when purchasing your laminate flooring.
Final Note
Allowing for cutting wastage ensures a smoother installation process and minimizes the risk of running out of material. By ordering a bit extra, you’re prepared for complex cuts, mistakes, and any future repairs, making it a worthwhile investment for a long-lasting floor.
Q - What is the best direction to install my Laminate Floor in
The best direction to install laminate flooring depends on the room’s layout, natural light, and personal preference. Here are some guidelines to help you decide:
1. Install Parallel to the Main Light Source
- General Rule: Lay the planks parallel to the room’s main light source, such as large windows or sliding glass doors. When light flows along the length of the planks, it enhances the floor’s appearance, highlighting the natural patterns and minimizing the visibility of seams.
- Benefit: This direction creates a sense of openness and enhances the look of the flooring by making it appear more seamless.
2. Install Along the Length of the Room
- Long, Narrow Rooms: For hallways, long living rooms, or rectangular spaces, lay the laminate planks along the length of the room. This aligns with the room’s natural flow and can make narrow spaces feel more spacious.
- Benefit: By laying planks in the same direction as the length of the room, you create an elongated, continuous look that enhances the perception of space.
3. Install Perpendicular to Floor Joists (If on Subfloor)
- Stability Consideration: If you’re installing laminate on an upper floor or over a wooden subfloor, lay the planks perpendicular to the floor joists for added stability. This reduces movement and helps prevent gaps or buckling over time.
- Benefit: This direction provides a stronger, more stable installation, especially important for floating floors.
4. Create Visual Flow Between Rooms
- Open Floor Plans: For open floor plans, laying the laminate in the same direction throughout the space creates a cohesive, continuous look. This also applies if you’re installing laminate in adjacent rooms; maintaining the same direction minimizes transition seams and makes the overall area feel larger.
- Benefit: A consistent direction across connected rooms enhances flow and can make the entire space feel more unified and expansive.
5. Diagonal or Herringbone Patterns (For Visual Interest)
- Diagonal Installation: Installing the laminate at a 45-degree angle to the walls can add visual interest and make a small room feel larger. This technique is more advanced but can create a striking design.
- Herringbone Pattern: A herringbone pattern adds sophistication and is an option if you want the floor to be a focal point. Some laminate flooring types come with planks designed for this pattern.
- Benefit: Diagonal or patterned installations create a custom look that can add a unique style to the room but may require additional material and cutting.
Summary of Best Direction Based on Room Type:
- Large, Bright Rooms: Parallel to the main light source.
- Long, Narrow Rooms (Hallways): Along the length of the room.
- Rooms with Wooden Subfloor: Perpendicular to the floor joists.
- Open Floor Plans: Consistent direction across all connected spaces.
Final Note
In most cases, installing laminate parallel to the primary light source or along the length of the room gives the best results. However, always consider room layout, subfloor, and personal style preferences. A well-chosen direction will not only make the room look more polished but also enhance the feel of the space
Q - How to choose between different surface finishes for your Laminate Floor
Choosing the right surface finish for your laminate flooring is essential for achieving both the aesthetic and functional qualities you desire. The finish affects the look, feel, durability, and maintenance of the floor. Here’s a guide to help you choose between different laminate floor finishes:
1. Smooth Finish
- Appearance: Provides a sleek, polished look, similar to traditional hardwood floors.
- Feel: Smooth and even underfoot.
- Best For: Contemporary or modern spaces where a clean, minimalist look is desired.
- Pros: Easy to clean and maintain. It also reflects light well, which can make a room appear larger.
- Cons: Can be more prone to showing scratches, dirt, and dust compared to textured finishes.
2. Textured or Embossed Finish
- Appearance: Designed to mimic the natural grain of wood, creating a more realistic look.
- Feel: Has a slightly raised texture that resembles the feel of real wood.
- Best For: Rustic, farmhouse, or traditional styles, as well as spaces where you want a more natural, wood-like appearance.
- Pros: Hides minor scratches and imperfections well due to the textured surface. Adds depth and realism to the flooring.
- Cons: Slightly harder to clean than a smooth finish as dirt can settle into the texture.
3. Hand-Scraped Finish
- Appearance: Replicates the look of hand-scraped hardwood with slight irregularities for an authentic, rustic appearance.
- Feel: Textured with noticeable grooves and indentations, mimicking hand-scraped wood.
- Best For: Rustic, vintage, or country-style decor, adding warmth and character to the space.
- Pros: Very forgiving with scratches and dents, as the texture conceals imperfections. Adds a high-end, artisanal touch.
- Cons: More expensive than other finishes and may require more attention when cleaning due to the deeper grooves.
4. High-Gloss Finish
- Appearance: Very shiny and reflective, giving the floor a polished, almost mirror-like appearance.
- Feel: Smooth underfoot, with a glossy surface.
- Best For: Formal spaces or modern interiors where a luxurious, refined look is desired.
- Pros: Reflects light well, enhancing brightness in the room. Creates a sophisticated, high-end appearance.
- Cons: Prone to showing scratches, scuffs, and footprints, so it may require more frequent cleaning and maintenance. Slipperier than other finishes, so it’s not ideal in areas prone to spills or for households with pets or young children.
5. Matte or Low-Gloss Finish
- Appearance: Subtle, low-shine finish that resembles natural wood and minimizes reflection.
- Feel: Smooth but non-reflective.
- Best For: Casual, natural, or minimalist decor. Also works well in busy households or high-traffic areas.
- Pros: Less prone to showing scratches, smudges, and dust, making it a low-maintenance option. Provides a natural, understated look.
- Cons: May not reflect as much light, so it may not make a space feel as bright or open.
6. Satin Finish
- Appearance: Falls between high-gloss and matte, with a subtle sheen that adds a slight reflection without being too shiny.
- Feel: Smooth with a low to medium gloss level.
- Best For: Versatile for most decor styles, providing a balance between polished and natural looks.
- Pros: Hides dirt, scratches, and dust well. Easy to maintain and offers a slight shine without the high maintenance of a high-gloss finish.
- Cons: Less dramatic than high-gloss but more reflective than matte, which might not appeal to those who prefer a very specific look.
7. Distressed Finish
- Appearance: Designed to look aged or worn, with intentional marks, knots, and scratches.
- Feel: Varied texture with deliberate imperfections for an authentic antique look.
- Best For: Vintage, rustic, or industrial decor styles.
- Pros: Perfect for hiding scratches and wear, making it ideal for high-traffic or pet-friendly homes. Adds character and a unique charm to the space.
- Cons: May be more costly due to the detailed manufacturing process. Some people may find the distressed look too busy for certain rooms.
Choosing the Right Finish Based on Needs
- High-Traffic Areas: Textured, hand-scraped, or distressed finishes are good choices as they hide scratches and wear better than smooth or high-gloss options.
- Low-Maintenance Preference: Matte, satin, or textured finishes require less frequent cleaning and show fewer footprints, smudges, or dust.
- Aesthetic Preference: For a modern, sleek look, opt for smooth or high-gloss finishes. For a rustic or natural look, consider textured, hand-scraped, or distressed finishes.
Final Note
Selecting the right laminate floor finish comes down to your style preferences, maintenance needs, and the room’s function. By balancing these factors, you’ll find a finish that not only looks great but also suits your lifestyle and enhances the room’s overall feel
Different floor profiles for Laminated Flooring, Expansion/Transition, Adjustment/Reducers and End Profiles
When installing laminate flooring, floor profiles are essential for ensuring a polished look and allowing for proper expansion and transitions between different surfaces. Here are the main types of floor profiles used for laminate flooring and their specific purposes:
1. Expansion or Transition Profiles
- Purpose: Expansion profiles, also known as transition profiles or T-moldings, are used to cover expansion gaps between two sections of laminate flooring. These gaps are necessary to accommodate the natural expansion and contraction of the flooring due to temperature and humidity changes.
- Where to Use: Typically installed between rooms or doorways where laminate flooring continues from one room to another. It’s also used to separate large areas of laminate in open-plan spaces, ensuring stability and allowing movement.
- Appearance: Shaped like a “T,” these profiles sit flush over the gap, creating a seamless connection between the two laminate sections.
- Benefits: Allows both sections of laminate to expand and contract independently, maintaining stability and preventing buckling.
2. Adjustment or Reducer Profiles
- Purpose: Also known as reducers or transition strips, adjustment profiles bridge the height difference between laminate flooring and a lower surface, such as vinyl, tile, or concrete.
- Where to Use: Used where laminate flooring meets another type of flooring that is lower in height, such as when transitioning from laminate to vinyl, tile, or concrete. This type of profile creates a gentle slope between the two surfaces.
- Appearance: Typically shaped to provide a sloping edge, ensuring a smooth transition that reduces tripping hazards and makes the transition appear seamless.
- Benefits: Provides a safe and aesthetically pleasing transition between floors of different heights, preventing exposed edges and protecting both flooring types from potential damage.
3. End Profiles (End Caps)
- Purpose: End profiles, also known as end caps or edge profiles, are used to cover the exposed edge of laminate flooring where it meets a wall, sliding door, carpet, or any other type of surface where the flooring ends.
- Where to Use: Used along walls, around fireplaces, or at patio doors, closets, and other areas where the laminate floor stops without adjoining another type of flooring.
- Appearance: These profiles have a flat edge on one side that fits against the wall or other surface, with a finished edge on the other side to cover the laminate’s edge.
- Benefits: Provides a clean, finished look to the edge of the flooring, protecting it from wear and tear while hiding expansion gaps.
4. Stair Nose Profiles
- Purpose: Stair nose profiles are specifically designed for use on stairs or steps where laminate flooring is installed. They create a rounded edge on stair treads.
- Where to Use: Used at the edge of each step on staircases, landings, or raised platforms.
- Appearance: These profiles have a rounded edge to sit flush with the edge of each stair, providing a clean and finished look while protecting the laminate edge.
- Benefits: Enhances safety by creating a smooth, stable edge on stairs and protecting the laminate from chipping or damage at the edges.
5. Quarter Round and Skirting Profiles
- Purpose: Quarter rounds and skirtings are primarily used to cover expansion gaps around the perimeter of the room where the laminate meets the wall.
- Where to Use: Installed along the edges of the room, covering the expansion gap between the laminate flooring and the wall. Skirtings (also called baseboards) provide a larger coverage, while quarter rounds can be added along the base of skirtings for additional finishing.
- Appearance: Quarter rounds are rounded, narrow moldings, while skirtings are larger, flat pieces that run along the bottom of the wall.
- Benefits: They hide expansion gaps while adding a finished look to the room’s perimeter and protecting the wall’s base from wear and tear.
Summary of Floor Profiles
| Profile Type | Purpose | Common Usage Area |
|---|---|---|
| Expansion / Transition | Covers expansion gaps between two laminate sections | Between rooms, doorways, large open-plan areas |
| Adjustment / Reducer | Bridges height difference between laminate and lower flooring | Where laminate meets lower surfaces like vinyl or tile |
| End Profiles | Finishes exposed edges of laminate | Along walls, doors, fireplaces, and other stopping points |
| Stair Nose | Creates finished edge on stairs and landings | Staircases, steps, and raised platforms |
| Quarter Round & Skirting | Covers perimeter expansion gaps | Along room edges, against walls |
Final Note
Using the correct profiles for laminate flooring ensures a durable, stable, and aesthetically pleasing installation. Each profile serves a unique purpose, enhancing the overall look of the floor while protecting it from damage and allowing for necessary expansion. Always check the manufacturer’s recommendations for profile types and installation guidelines to maintain a cohesive and professional finish
Q - What is HDF board used for laminated flooring
High-Density Fiberboard (HDF) is a critical component in the construction of laminate flooring. It forms the core layer of laminate planks, providing strength, stability, and durability. Here’s a closer look at what HDF is and why it’s used in laminate flooring:
What is HDF?
HDF (High-Density Fiberboard) is an engineered wood product made by compressing wood fibers with resins and adhesives under high heat and pressure. The result is a dense, sturdy board that is significantly stronger and more stable than other types of fiberboard, such as MDF (Medium-Density Fiberboard). HDF typically has a density above 800 kg/m³, making it durable and ideal for high-impact applications.
Why HDF is Used in Laminate Flooring
HDF is widely used as the core material in laminate flooring for several reasons:
Durability and Strength: HDF’s high density provides the structural strength needed for a stable, long-lasting floor. It can withstand daily wear and tear, making it suitable for high-traffic areas.
Impact Resistance: The compressed wood fibers in HDF make it highly resistant to impacts, so laminate floors can handle foot traffic, furniture, and heavy items without denting easily.
Smooth and Consistent Surface: HDF offers a smooth and uniform surface, which is ideal for bonding with the decorative top layer. This helps laminate floors achieve a seamless, polished look that mimics hardwood or stone.
Moisture Resistance (Compared to MDF): While not waterproof, HDF is more moisture-resistant than MDF due to its density. Some laminate flooring brands treat the HDF core with special coatings to enhance its water resistance, though it is still not as waterproof as vinyl flooring.
Precision Milling for Click-Lock Systems: HDF allows for precise cuts, making it ideal for the click-lock or tongue-and-groove systems used in laminate flooring. This precision ensures that each plank locks tightly with others, creating a stable, floating floor.
Structure of a Laminate Floor with HDF Core
Laminate flooring typically has four main layers:
- Wear Layer: The top, transparent layer that provides protection against scratches, stains, and fading.
- Decorative Layer: A high-resolution photograph that mimics wood, stone, or other natural materials, giving the laminate its realistic appearance.
- HDF Core Layer: The core layer made from HDF, providing strength, stability, and impact resistance.
- Backing Layer: The bottom layer, which adds stability to the plank and sometimes includes moisture-resistant properties to protect the floor from humidity and moisture from the subfloor.
Benefits of Using HDF in Laminate Flooring
- Enhanced Stability: HDF’s density provides a stable foundation, reducing the risk of the flooring shifting or warping.
- Affordable Alternative to Hardwood: HDF allows laminate to be a cost-effective option that mimics the appearance of natural wood.
- Consistent Quality: The engineered nature of HDF ensures a uniform quality throughout the flooring, with fewer imperfections than natural wood.
Limitations of HDF in Laminate Flooring
- Limited Moisture Resistance: While HDF is more moisture-resistant than MDF, it can still swell or warp if exposed to excessive moisture, which is why laminate flooring isn’t recommended for very wet areas like bathrooms.
- Sensitivity to Temperature Changes: HDF can expand and contract with changes in temperature and humidity, requiring expansion gaps around the perimeter of laminate floors to allow for movement.
Final Note
HDF provides laminate flooring with a solid, stable core that contributes to its durability, impact resistance, and affordability. By using HDF, laminate flooring manufacturers can produce floors that look like hardwood or stone but are more accessible and easier to maintain.
Q - How do I get the shine of my Laminate floor to increase
Increasing the shine of your laminate floor can make it look fresh and well-maintained. While laminate floors have a factory finish that shouldn’t be waxed or polished with traditional wood floor products, there are specific techniques and products that can enhance its natural shine. Here’s how to safely bring out the shine on your laminate floor:
1. Regular Cleaning with the Right Products
- Dust and Sweep Daily: Dust and dirt can dull laminate floors. Use a soft-bristled broom or a microfiber dust mop to clean daily. Avoid using abrasive cleaning tools that could scratch the surface.
- Use a Damp Mop: Mop the floor regularly with a slightly damp microfiber mop. Avoid soaking the floor with water, as excessive moisture can damage laminate. Always wring out the mop well before use.
- Laminate Floor Cleaner: Use a cleaner specifically designed for laminate floors. Avoid harsh chemicals, ammonia, or bleach, as these can strip away the finish. Spray the cleaner sparingly on the mop or floor, then wipe.
2. Use a Vinegar and Water Solution (Occasionally)
- Mix a Solution: Create a mixture of 1 part vinegar to 3 parts water in a spray bottle. Add a few drops of mild dish soap if needed.
- Dampen Mop, Don’t Soak: Lightly spray the floor with this solution and mop immediately. Vinegar helps remove residue buildup, restoring the laminate’s shine. However, use it sparingly to avoid over-exposing the floor to moisture or acidity.
3. Buffing with a Microfiber Cloth
- Hand Buffing: After mopping, you can increase shine by buffing the floor with a dry microfiber cloth or a soft towel. Focus on high-traffic areas that might look duller.
- Floor Buffer: For larger areas, consider using a floor buffer with a microfiber pad attachment, if available. Be cautious not to apply too much pressure.
4. Avoid Wax, Polish, or Oil-Based Products
- Laminate floors have a factory-applied protective layer and should not be treated with wax, polish, or oil-based products. These can leave a residue, making the floor look dull and streaky. Over time, wax can also cause a buildup that is difficult to remove.
5. Remove Residue or Streaks
- For Stubborn Streaks: If streaks or a dull film remain, try using a specialized laminate floor cleaner or the vinegar and water solution as described above. This helps to break down residues left from previous cleanings.
- Glass Cleaner (Occasionally): For stubborn spots, you can use a mild, ammonia-free glass cleaner. Spray a small amount onto a cloth and wipe gently. Be sure to buff it dry immediately.
6. Place Rugs and Mats in High-Traffic Areas
- To keep the floor looking shiny, protect high-traffic areas with rugs or mats to minimize wear and tear. Use mats near entryways to catch dirt and moisture that could dull the floor over time. Make sure any mats or rugs have non-slip backing that’s safe for laminate.
7. Humidity Control
- Laminate floors can expand and contract with changes in humidity, which can lead to slight warping that reduces the reflective quality of the floor. Maintain indoor humidity levels between 45-65% to preserve the floor’s condition.
Quick Steps to Shine Laminate Flooring
- Sweep or dust mop daily to prevent scratching.
- Use a damp mop with a laminate-safe cleaner weekly.
- Occasionally use a vinegar and water solution to remove residue.
- Buff the floor with a microfiber cloth or pad after cleaning.
- Avoid products that leave a residue, like wax or polish.
By following these tips, you can keep your laminate floor looking clean, bright, and shiny without damaging its protective finish. Regular care is key to maintaining the natural sheen and ensuring that it stays looking great for years
Q - Can I install laminate flooring over carpets
Installing laminate flooring over carpet is generally not recommended, as it can lead to instability, unevenness, and potential long-term damage to both the carpet and laminate. However, there are some exceptions and considerations based on the type of carpet and specific conditions. Here’s a breakdown of why it’s typically discouraged and the few situations where it may be possible.
Why Laminate Shouldn’t Be Installed Over Carpet
Instability and Unevenness: Carpet provides a soft, cushioned surface that doesn’t offer the solid, even base required for laminate flooring. Over time, this can cause the laminate to flex, shift, and develop gaps or clicks, compromising its durability and causing damage to the locking mechanism.
Moisture and Airflow Issues: Carpet can trap moisture, which can seep into the laminate from below and cause warping, swelling, or mildew. Laminate floors also require proper airflow underneath, which a carpet layer can restrict, leading to potential moisture buildup.
Hygiene Concerns: Dust, dirt, and allergens can accumulate under the laminate if it’s installed over carpet, which can become a hygiene issue, especially in areas where the carpet is older or in high-traffic zones.
Warranty Voiding: Most laminate flooring manufacturers will void the warranty if it is installed over carpet, as this setup doesn’t comply with recommended installation guidelines.
Situations Where It Might Be Possible
While not ideal, there are a few cases where installing laminate over carpet could work, particularly with low-pile or commercial-grade carpet:
Low-Pile or Indoor-Outdoor Carpet: Thin, low-pile carpet, such as commercial or indoor-outdoor carpet, may sometimes be suitable if it is tightly affixed to the floor and provides minimal cushioning. Even then, it’s best to consult the manufacturer’s guidelines, as some low-pile carpets may still create an uneven surface.
Temporary Installations: For temporary flooring, like in a rental property or a short-term event, laminate over carpet may be an option. However, use a firm underlay specifically designed for laminate over carpet to provide more stability. This approach should only be used if the installation is short-term.
Recommended Steps for Installation over Low-Pile Carpet (if absolutely necessary)
- Check Carpet Type: Ensure the carpet is low-pile, tightly installed, and minimal in cushioning.
- Use a Firm Underlay: Choose an underlay designed for stability, as it will add a more solid foundation between the carpet and laminate.
Best Solution: Remove Carpet and Prepare Subfloor
For a long-lasting, stable installation, it’s always best to remove the carpet and prepare the subfloor according to laminate flooring requirements:
- Remove Carpet and Padding: Strip down to the subfloor (typically concrete or plywood), and remove any leftover adhesive, nails, or staples.
- Clean and Level the Subfloor: Ensure the subfloor is clean, dry, and level, as any irregularities can impact the laminate’s stability.
- Install Laminate with the Recommended Underlay: Use an underlay suitable for laminate, which provides cushioning, sound insulation, and moisture protection.
Final Note
While it’s possible to install laminate over certain types of carpet, it’s generally not advisable for a durable, long-term solution. Removing the carpet and preparing the subfloor ensures a more stable, even, and lasting laminate floor installation. This approach also complies with manufacturer guidelines, protecting your warranty and the integrity of the laminate flooring.
Q - Can I install laminate flooring over ceramic or porcelain tiles
Yes, you can install laminate flooring over ceramic or porcelain tiles, provided the tiles meet certain conditions. This can be a great way to update a space without the need for costly tile removal. Here’s what you need to consider and the steps to take for a successful installation:
Conditions for Installing Laminate Over Tile
Even and Level Surface: The tile floor should be even and level. Laminate requires a flat surface to maintain stability and prevent issues like gaps, clicks, or cracking in the planks. Check for any high spots or uneven grout lines. Generally, there shouldn’t be any dips or rises greater than 3 mm across 1 meter.
No Loose or Damaged Tiles: All tiles must be secure, with no loose, cracked, or damaged areas. Loose tiles can cause instability in the laminate and lead to buckling. Replace or secure any loose tiles before installing the laminate.
Clean and Dry Surface: Ensure the tile floor is thoroughly cleaned and free of dust, grease, and any debris that could interfere with the laminate installation. The floor should also be dry to prevent moisture from seeping into the laminate.
Installing Laminate Flooring Over Tile: Step-by-Step Guide
Check and Level the Surface: Use a leveling compound to fill in low spots or grout lines that might affect the smoothness of the surface. This step is especially important if the grout lines are deep. Allow the compound to fully cure as per the manufacturer’s instructions.
Lay an Underlay: Laminate flooring requires underlay for cushioning, sound insulation, and moisture protection. Choose an underlay suitable for laminate over tile. Foam or cork underlays are popular choices as they provide a slight cushion to even out minor tile surface imperfections.
Leave Expansion Gaps: Laminate flooring expands and contracts with changes in temperature and humidity, so leave an expansion gap (typically around 10 mm) around the perimeter of the room and any fixed objects. Use spacers to ensure a consistent gap throughout the installation.
Install Laminate with a Click-Lock System: Follow the manufacturer’s instructions to install the laminate planks using the click-lock system. Start in one corner of the room and work your way across, ensuring each plank locks securely into place with the previous row. Ensure the seams are tight to prevent shifting or gaps.
Add Transition Strips and Molding: Install transition strips at doorways and where the laminate meets other flooring types to create a seamless look. Use baseboards or quarter rounds along the walls to cover the expansion gaps.
Advantages of Installing Laminate Over Tile
- Saves Time and Effort: Installing laminate over tile avoids the mess and labor involved in tile removal, making it a quicker, less invasive renovation option.
- Cost-Effective: Removing tile and preparing a new subfloor can be costly. By using the existing tile as a base, you can save on labor and disposal costs.
- Added Insulation: The tile acts as an extra layer of insulation, especially when combined with an underlay, which can make the floor feel warmer underfoot.
Disadvantages and Considerations
- Increased Floor Height: Installing laminate over tile will raise the floor level, which could affect door clearances, baseboards, and transitions to other rooms. Measure carefully and consider trimming doors or adjusting baseboards if necessary.
- Potential Sound Transmission: If sound insulation is a concern, choose an underlay designed to reduce sound transmission, as tile can sometimes amplify noise beneath the laminate.
Final Note
Installing laminate flooring over ceramic or porcelain tile is a feasible and cost-effective option if the tiles are even, secure, and undamaged. By following proper installation steps, you can achieve a smooth, stable, and attractive laminate floor without the hassle of tile removal
Q - Can I install laminate flooring over hardwood parquet blocks
Installing laminate flooring over hardwood parquet blocks is not recommended due to potential moisture and expansion issues. Here’s why it’s typically discouraged and the risks involved:
Reasons to Avoid Installing Laminate Over Parquet Blocks
Moisture Trapping: Laminate flooring and its underlay can trap moisture between the laminate and the parquet. Parquet blocks, made from natural wood, are sensitive to humidity and moisture. When moisture is trapped, it can cause the parquet to swell, expand, or even warp, leading to an uneven surface underneath the laminate.
Expansion and Lifting of Parquet: Wood parquet floors expand and contract with changes in temperature and humidity. If parquet blocks expand or lift due to moisture, they can push against the laminate flooring, creating buckling, gaps, or lifting in the laminate. This can quickly lead to a damaged and uneven laminate surface.
Incompatibility with Laminate’s Floating Design: Laminate flooring is designed to be installed on a stable, flat, and non-moving surface. Parquet blocks, which may shift or swell over time, do not provide a stable base, compromising the structural integrity of the laminate’s floating design.
Voiding Warranties: Many laminate manufacturers specify that their products should not be installed over natural wood surfaces like parquet due to the risk of moisture and expansion. Ignoring these guidelines could void the warranty on your laminate flooring.
Recommended Alternative: Remove Parquet and Prepare Subfloor
For a long-lasting and stable laminate installation, it’s best to remove the parquet blocks and prepare the subfloor properly:
Remove Parquet Blocks: Strip down to the subfloor by removing the parquet blocks. This will provide a more stable, moisture-resistant base for the laminate flooring.
Prepare and Level the Subfloor: Ensure the subfloor is clean, level, and dry. You may need to use a leveling compound if there are any uneven areas.
Install a Suitable Underlay: Use an underlay designed for laminate flooring, which provides sound insulation, cushioning, and a moisture barrier to protect against humidity from below.
Final Note
Installing laminate flooring over parquet blocks may seem convenient, but it comes with significant risks of moisture entrapment, expansion, and instability. Removing the parquet and properly preparing the subfloor will ensure a durable, stable, and long-lasting laminate floor installation.
Q - Can I install laminate flooring over vinyl / resilient flooring
Yes, you can install laminate flooring over vinyl or resilient flooring, but there are specific conditions to ensure a stable and lasting installation. Here’s what to consider:
Conditions for Installing Laminate Over Vinyl or Resilient Flooring
- Even and Level Surface: The existing vinyl or resilient floor should be even, level, and securely adhered to the subfloor. Laminate requires a smooth, stable base to prevent shifting, gaps, or buckling. Check for any high or low spots, which could compromise the laminate’s stability.
- Thickness of Existing Flooring: The vinyl or resilient flooring should not be too thick or cushioned. Thick or cushioned vinyl can cause the laminate to flex or shift, leading to an unstable floor. Typically, thin, hard-wearing vinyl is ideal as a base for laminate installation.
- Clean and Dry Surface: Ensure the vinyl or resilient flooring is clean, dry, and free of debris. Any dirt or trapped moisture can affect the installation and lead to mold or warping over time.
- No Major Moisture Issues: If the vinyl is installed over a concrete subfloor, make sure there are no moisture issues. Moisture can seep through the concrete and affect both the vinyl and laminate, potentially causing swelling or warping.
How to Install Laminate Over Vinyl or Resilient Flooring
- Inspect and Repair: Examine the vinyl floor for any loose sections, tears, or damage. Repair or secure any areas that could cause an uneven surface.
- Lay an Underlay: Use an underlay designed for laminate flooring over hard surfaces. The underlay provides sound insulation, moisture protection, and a slight cushion, which will help the laminate perform better over the vinyl. Make sure to follow the laminate manufacturer’s recommendations for the type of underlay to use.
- Leave Expansion Gaps: Just like with any laminate installation, leave an expansion gap (usually around 10 mm) around the perimeter of the room. This allows the laminate to expand and contract naturally with temperature and humidity changes.
- Install the Laminate: Begin laying the laminate planks, starting in one corner of the room. Use the click-lock system to secure each plank in place, following the manufacturer’s instructions for a tight, stable fit.
- Add Finishing Touches: Use baseboards or quarter rounds to cover the expansion gaps, and apply transition strips at doorways or areas where the laminate meets other flooring types.
Advantages of Installing Laminate Over Vinyl
- Saves Time and Effort: Installing laminate over an existing vinyl floor avoids the hassle of floor removal, making it a quicker and easier update.
- Cost-Effective: Not having to remove the vinyl or resilient flooring reduces labor and disposal costs.
- Added Insulation: The vinyl provides an extra layer of insulation, especially when combined with an underlay, making the laminate feel warmer and quieter underfoot.
Potential Challenges and Considerations
- Increased Floor Height: Adding laminate over vinyl will raise the floor height, which could affect door clearance and require adjustments to baseboards and transitions between rooms.
- Warranty Considerations: Some laminate manufacturers specify installation guidelines regarding existing flooring types. Check the manufacturer’s instructions to ensure that installing over vinyl won’t void the warranty.
- Moisture Concerns: Vinyl and resilient floors can trap moisture, especially if installed over concrete. If moisture is a concern, consider using a moisture barrier underlay to protect the laminate.
Final Note
Installing laminate flooring over vinyl or resilient flooring is possible and often practical if the vinyl floor is in good condition and meets the necessary requirements. By ensuring a level surface, using the appropriate underlay, and following proper installation steps, you can achieve a durable, attractive laminate floor without the need to remove the existing vinyl.
Q - Do Laminate Flooring require a DPM damp proof membrane
Yes, laminate flooring often requires a Damp Proof Membrane (DPM), especially when installed over subfloors that may be prone to moisture, such as concrete or ground-level floors. A DPM helps prevent moisture from seeping up from the subfloor, which can damage the laminate planks by causing warping, swelling, or mold growth.
When a DPM is Needed
A DPM is typically necessary in the following situations:
Concrete Subfloors: Concrete can retain moisture, even if it appears dry. A DPM is essential when installing laminate flooring over concrete to prevent moisture from seeping into the laminate, which could lead to expansion and damage.
Ground-Level or Below-Grade Floors: Moisture is more likely to rise through floors that are at or below ground level. Installing a DPM is a good precaution to prevent moisture from affecting the laminate.
Newly Laid Concrete: Fresh concrete subfloors take time to fully cure, which can take several weeks or even months. Installing a DPM over new concrete ensures moisture won’t reach the laminate flooring during the curing process.
Moisture-Prone Areas: If you live in a particularly humid or damp environment, or if the room tends to accumulate moisture (like basements), a DPM can provide extra protection for your laminate floor.
Types of DPM for Laminate Flooring
Built-In DPM Underlay: Some laminate underlays come with an integrated DPM layer. These are ideal for installations over concrete or in moisture-prone areas, as they combine cushioning and moisture protection in a single product.
Separate DPM Sheet: For added protection, you can lay a separate plastic DPM sheet directly on the subfloor before installing the underlay and laminate. Make sure to overlap the edges of the DPM sheets by at least 20 cm and tape the seams to create a continuous barrier.
Foam Underlay with Moisture Barrier: Some foam underlays are designed to resist moisture and can provide a degree of protection in areas with minimal moisture. However, they are not as effective as a full DPM in high-moisture environments.
How to Install a DPM
Clean the Subfloor: Ensure the subfloor is clean, dry, and free of debris before installing the DPM.
Lay the DPM Sheet: If using a separate DPM, roll out the sheet and overlap the edges by at least 20 cm. Use waterproof tape to seal the seams. Extend the DPM slightly up the walls to create a complete moisture barrier around the edges, which you can trim after installing the laminate.
Add the Underlay: Place the underlay on top of the DPM, following the manufacturer’s recommendations. The underlay provides cushioning and sound insulation, which is necessary for a comfortable and stable laminate floor.
Install the Laminate Flooring: Once the DPM and underlay are in place, you can install the laminate planks as per the usual installation instructions.
Benefits of Using a DPM
- Protects Laminate from Moisture Damage: A DPM creates a barrier between the subfloor and laminate, preventing moisture from causing warping, swelling, and other damage.
- Prevents Mold and Mildew: By keeping moisture out, a DPM reduces the risk of mold and mildew growth beneath the floor.
- Increases Durability and Lifespan: Protecting the laminate from moisture extends its lifespan, ensuring a more durable and stable floor.
Final Note
A DPM is a smart investment for laminate flooring installed over moisture-prone subfloors, such as concrete or ground-level areas. It provides a layer of protection against moisture, helping to ensure the longevity and performance of your laminate floor. Always follow the manufacturer’s recommendations for underlay and moisture protection to maintain warranty coverage and ensure the best results.
Q - How to repair minor scratches on Laminate Flooring
Repairing minor scratches on laminate flooring is relatively simple and can restore the floor’s appearance without the need for replacement. Here are effective methods for fixing minor scratches:
1. Laminate Floor Repair Kits
- What They Are: Many manufacturers offer repair kits specifically for laminate floors, which typically include wax crayons, putty, or color-matched markers to fill in scratches.
- How to Use: Clean the area around the scratch first. Use the color-matched wax crayon or marker to fill in the scratch, following the grain direction for a natural look. Buff with a soft cloth to blend the repair with the surrounding area.
- Pros: These kits are easy to use and match the color of the laminate, providing an effective and nearly invisible repair.
2. Wax or Crayon Filler
- What They Are: Wax filler sticks or crayons can be used to fill in scratches. Choose a color that matches the laminate for the best result.
- How to Use: Rub the wax filler stick over the scratch, pressing down to ensure it fills in the scratch completely. Remove any excess wax with a plastic scraper or a soft cloth. Buff gently to blend the repair with the floor.
- Pros: Affordable and effective for small, shallow scratches. Wax crayons blend well and offer a natural finish.
3. Color-Matched Laminate Markers
- What They Are: These markers are specially designed to match laminate flooring colors and are perfect for small scratches or scuffs.
- How to Use: Clean the scratched area, then apply the marker directly to the scratch, following the grain direction if there is one. Allow the ink to dry for a few minutes, and then gently buff with a cloth to blend the color.
- Pros: Quick and easy solution for minor scratches, providing good color matching for various laminate shades.
4. Laminate Floor Polish (for Light Surface Scratches)
- What It Is: Laminate floor polish is designed to add a thin protective layer, which can help to minimize the appearance of light surface scratches.
- How to Use: After cleaning the floor thoroughly, apply a small amount of laminate floor polish to a microfiber cloth or mop. Apply it over the scratched area using circular motions, then let it dry. Buff lightly to create an even finish.
- Pros: Ideal for very light, surface-level scratches, giving the floor a refreshed look.
5. DIY Remedies for Surface Scratches (Temporary Solution)
- Nuts: For small surface scratches, try rubbing a walnut or pecan over the scratch. The natural oils from the nut can help fill in the scratch temporarily.
- Olive Oil and Vinegar Mixture: For minor surface blemishes, mix a small amount of olive oil with vinegar and rub it onto the scratch with a soft cloth. Wipe away the excess with a clean cloth.
- Pros: Quick, temporary fix for minor surface scratches, though not as durable as a dedicated repair product.
Additional Tips for Scratch Repair
- Clean the Area First: Always clean the area around the scratch before applying any filler or repair solution. Dirt and dust can prevent the filler from adhering properly.
- Test on a Small Area: Test any repair product on a small, inconspicuous area to ensure color match and adhesion.
- Avoid Excess Moisture: Use only a damp cloth when cleaning laminate, as excess moisture can seep into the core and cause warping.
Preventing Future Scratches
- Use Furniture Pads: Place felt pads under furniture legs to prevent scratching when moving items.
- Regular Dusting and Sweeping: Dust and grit can cause micro-scratches. Regularly sweep or dust mop to keep the floor scratch-free.
- Avoid Harsh Cleaners: Stick to laminate-safe cleaners and avoid abrasive tools that could scratch the surface.
Final Note
For best results, use a laminate floor repair kit or color-matched filler for scratch repairs. These products are designed to blend seamlessly with the laminate, providing a nearly invisible repair. Regular maintenance and taking preventative measures can help keep your laminate floor looking its best.
Q - What is the Wear or Quality rating for Laminate Flooring
The wear layer is a critical component of laminate flooring that provides protection against scratches, scuffs, stains, and general wear. It’s a transparent, durable layer on the top surface of each laminate plank, designed to shield the decorative layer beneath and extend the life of the flooring.
Understanding the Wear Layer
- Material: The wear layer is usually made from melamine or aluminum oxide. These materials are highly resistant to scratches, dents, and UV light, which helps prevent fading.
- Purpose: The wear layer acts as a barrier against daily wear and tear, such as foot traffic, spills, and impact from furniture or pets. It also makes the flooring easier to clean and maintain, as dirt and spills stay on the surface.
- Thickness: The durability of the wear layer can vary, with thicker layers offering greater resistance. High-quality laminate flooring generally has a thicker wear layer, making it more suitable for areas with heavy traffic.
How Laminate Floors Are Graded or Rated
Laminate flooring is graded or rated using two primary systems:
- AC (Abrasion Criteria) Rating: Measures the durability of the wear layer.
- Grade Rating (21, 22, 23 for residential and 31, 32, 33 for commercial): Indicates the level of traffic the laminate can handle in specific environments.
1. AC Rating System
The AC rating is an industry-standard measure of laminate flooring’s resistance to wear, impact, stains, and other forms of abrasion. It ranges from AC1 to AC5, with each level indicating different levels of durability:
- AC1: Light Residential – Suitable for low-traffic areas, such as bedrooms. Designed for minimal wear and tear.
- AC2: General Residential – Suitable for moderate traffic, such as living rooms or dining rooms.
- AC3: Heavy Residential / Light Commercial – Ideal for high-traffic residential areas like kitchens and hallways, or low-traffic commercial spaces.
- AC4: General Commercial – Suitable for moderate-traffic commercial areas like offices, boutiques, and cafes.
- AC5: Heavy Commercial – Best for high-traffic commercial spaces like retail stores, public buildings, and restaurants.
The higher the AC rating, the thicker and more durable the wear layer, making the flooring better suited for high-traffic or commercial environments.
2. Grade Rating System
The Grade rating specifies the suitability of laminate flooring for different levels of foot traffic in both residential and commercial spaces:
Residential Grades:
- Grade 21: Light residential use (e.g., bedrooms).
- Grade 22: Moderate residential use (e.g., living rooms, dining rooms).
- Grade 23: Heavy residential use (e.g., kitchens, hallways, entryways).
Commercial Grades:
- Grade 31: Light commercial use (e.g., small offices, conference rooms).
- Grade 32: General commercial use (e.g., offices, waiting rooms).
- Grade 33: Heavy commercial use (e.g., retail stores, schools, restaurants).
The Grade rating helps users select laminate that matches both the expected level of foot traffic and the environment. Grades 21–23 are typically used in homes, while Grades 31–33 are intended for businesses and other commercial areas.
How to Use Wear Layer, AC, and Grade Ratings Together
- For residential settings, AC3 or Grade 23 is typically sufficient for high-traffic areas, like kitchens and entryways, while AC2 or Grade 22 works well for lower-traffic rooms.
- In commercial settings, AC4 or Grade 32 is a good choice for moderate traffic, like in offices, while AC5 or Grade 33 is best for high-traffic public spaces.
Comparison Table for Laminate Flooring Ratings
| Grade Rating | AC Rating | Traffic Type | Suitable Environments | Durability Level | Ideal Areas |
|---|---|---|---|---|---|
| 21 | AC1 | Light Residential | Bedrooms, guest rooms | Low | Minimal traffic; light use |
| 22 | AC2 | General Residential | Living rooms, dining rooms | Moderate | Regular foot traffic |
| 23 | AC3 | Heavy Residential | Kitchens, hallways, entryways | High | High-traffic residential areas |
| 31 | AC3 | Light Commercial | Small offices, conference rooms, hotel rooms | High | Occasional foot traffic, low wear |
| 32 | AC4 | General Commercial | Offices, waiting rooms, boutiques | Very High | Moderate-traffic commercial settings |
| 33 | AC5 | Heavy Commercial | Retail stores, schools, restaurants | Maximum | High-traffic, continuous foot traffic |
Final Note
The wear layer, AC rating, and Grade rating provide a complete picture of a laminate floor’s durability and suitability for different spaces. By considering all three, you can select a laminate floor that meets your needs for appearance, durability, and resistance to wear, ensuring a long-lasting and appropriate flooring choice for your space.
Q - What the the advantages of Laminated Wood Flooring
Laminate wood flooring offers several advantages, making it a popular choice for both residential and commercial spaces. Its affordability, durability, and realistic wood appearance are just a few reasons why homeowners and businesses often choose laminate over other flooring types. Here are the main advantages of laminate wood flooring:
1. Affordability
- Cost-Effective: Laminate flooring is generally more affordable than hardwood, engineered wood, or tile flooring. This makes it an attractive option for budget-conscious homeowners who still want the look of wood.
- Wide Price Range: Laminate comes in various price points, allowing customers to choose based on their budget while still enjoying the benefits of a wood-like floor.
2. Realistic Appearance
- Wood-Look Finishes: High-quality laminate flooring can closely mimic the appearance of natural wood, including grain patterns, textures, and colors, often making it difficult to distinguish from real hardwood.
- Variety of Styles: Laminate offers a broad range of styles, including finishes that resemble oak, maple, walnut, and exotic wood species. This variety allows for flexibility in matching various interior design preferences.
3. Durability and Wear Resistance
- Scratch-Resistant Surface: The wear layer on laminate flooring is designed to resist scratches, stains, and dents, making it suitable for high-traffic areas, homes with pets, or spaces where furniture may be moved frequently.
- Abrasion Criteria (AC) Ratings: Laminate flooring with higher AC ratings is suitable for heavy residential and even commercial use, providing a durable solution that can withstand regular wear and tear.
- UV Resistance: Many laminate floors are resistant to UV light, which helps prevent fading over time when exposed to sunlight.
4. Easy Installation
- Click-Lock System: Most laminate flooring uses a click-lock or tongue-and-groove system, which allows the planks to be easily installed without glue or nails. This floating floor design is perfect for DIY installations.
- Installation Over Existing Floors: Laminate can often be installed directly over existing floors, such as vinyl or tile, reducing the need for subfloor preparation and saving time and effort.
5. Low Maintenance
- Easy to Clean: Laminate floors are relatively low-maintenance and require only regular sweeping or vacuuming and occasional damp mopping to keep them clean.
- Stain and Spill Resistance: The wear layer protects against spills and stains, making it easier to clean up accidents without damaging the surface.
- No Need for Waxing or Polishing: Unlike hardwood, laminate does not need waxing or polishing, which saves time and upkeep costs.
6. Moisture Resistance
- Suitable for Moisture-Prone Areas: Many laminate options are water-resistant and can handle moisture better than solid hardwood. This makes laminate suitable for kitchens, entryways, and even some types designed for bathrooms or basements.
- Improved Water-Resistant Technology: Newer laminate flooring options come with enhanced water-resistant cores and edge sealing technology, providing extra protection against moisture.
7. Comfort and Insulation
- Added Comfort Underfoot: Laminate flooring is softer than tile or stone and can feel more comfortable to walk on, especially when installed with a quality underlay.
- Sound and Thermal Insulation: Laminate’s underlay adds an extra layer of sound and thermal insulation, making the floor quieter to walk on and potentially improving energy efficiency in the room.
8. Environmentally Friendly Options
- Sustainable Materials: Many laminate floors are made from recycled materials and use sustainably sourced wood products.
- Less Environmental Impact: Compared to solid hardwood, laminate production uses fewer resources and creates less waste, making it a more environmentally friendly choice in some cases.
9. Versatile Applications
- Residential and Commercial Use: With various grades and AC ratings, laminate flooring can be used in both residential and commercial spaces, from living rooms and kitchens to offices and small retail spaces.
- Wide Range of Styles and Finishes: Laminate flooring is available in a wide array of designs, including wood, stone, and even tile looks, providing flexibility to suit different decor styles.
10. Long Lifespan with Proper Care
- Durable for Long-Term Use: High-quality laminate flooring can last 15-25 years or more with proper care, making it a cost-effective investment.
- Warranty Protection: Many laminate flooring products come with long warranties, covering wear, fading, and other issues, which can provide peace of mind for buyers.
Summary of Laminate Flooring Advantages
| Advantage | Benefit |
|---|---|
| Affordability | Cost-effective, with options for different budgets |
| Realistic Appearance | Mimics natural wood, with a wide range of styles and finishes |
| Durability | Scratch-resistant, stain-resistant, and suitable for high-traffic areas |
| Easy Installation | DIY-friendly click-lock system, can be installed over existing floors |
| Low Maintenance | Simple cleaning, no need for waxing or polishing |
| Moisture Resistance | (not all) Suitable for kitchens, entryways, and some moisture-prone areas |
| Comfort and Insulation | Comfortable underfoot, provides sound and thermal insulation |
| Environmentally Friendly | Uses sustainable materials, less waste in production |
| Versatile Applications | Suitable for both residential and commercial spaces |
| Long Lifespan | Durable with proper care, warranties available |
Final Note
Laminate flooring’s affordability, durability, and versatility make it a popular choice for those seeking an attractive and functional alternative to hardwood or tile. With advancements in technology, laminate has become even more resistant to moisture, wear, and fading, making it suitable for various applications and environments
Q - Is laminate flooring safe for my Pets and will their nails scratch the floor
Laminate flooring can be a pet-friendly option due to its durability, scratch resistance, and easy maintenance. However, there are a few considerations regarding pet safety and the potential for scratches from pet nails.
1. Scratch Resistance
- Durability of the Wear Layer: Laminate flooring is designed with a durable wear layer that makes it resistant to scratches, stains, and general wear. This protective layer helps guard against scratches from pet nails, especially in higher-rated laminate (AC3 and above).
- Choosing Higher AC Ratings: For pet owners, choosing laminate with an AC3 or higher rating can offer extra protection. AC3 (Heavy Residential) and above are better suited to handle the daily wear and tear that comes with pets, including potential scratches from their nails.
2. Tips to Prevent Scratches from Pet Nails
- Keep Nails Trimmed: Regularly trimming your pet’s nails helps minimize scratching and prolongs the life of your laminate floor. Many times, long or sharp nails cause unnecessary wear.
- Use Rugs in High-Traffic Areas: Place rugs or mats in areas where your pets frequently walk or run, such as near doorways or in play areas. This can help reduce wear in these spots.
- Protective Nail Caps: Soft nail caps for pets can be applied to reduce scratching. These caps are designed for comfort and are a temporary solution, particularly if scratching is an ongoing issue.
3. Pet Safety
- Slip Resistance: Laminate floors can be slippery for pets, especially if they have long nails or are energetic. To help with traction, place non-slip rugs in high-traffic areas or consider using rugs with non-slip pads to prevent sliding.
- Chemical Safety: High-quality laminate flooring is generally safe for pets as long as it complies with safety standards for emissions and toxins. Look for laminate flooring certified by environmental standards, such as FloorScore or GREENGUARD, which ensure low VOC emissions.
- Spill and Accident Resistance: Laminate floors can handle minor spills or accidents if cleaned up promptly. However, because laminate is not entirely waterproof, it’s important to clean up any pet accidents quickly to prevent moisture from seeping into the seams and causing warping or swelling.
4. Easy to Clean and Maintain
- Stain Resistance: Laminate’s wear layer also helps protect against stains, making it easier to clean up pet-related messes like fur, drool, or minor accidents.
- Simple Maintenance: Regular sweeping or vacuuming will keep the floor free of pet hair and dander. Occasional damp mopping with a laminate-safe cleaner can remove any lingering residues or pet odors.
5. Consider Water-Resistant Laminate Options
- Enhanced Water-Resistant Laminate: Some modern laminates are designed to be more water-resistant, which can be especially beneficial for pet owners. These options offer extra protection against moisture from spills or pet accidents, making them more resilient in pet-friendly homes.
- Pet-Friendly Alternatives: If water resistance is a top concern, consider vinyl plank flooring, which is 100% waterproof and still offers a wood-like appearance. This may be an alternative if your pets are prone to spills or accidents.
Summary Table: Laminate Flooring and Pet Considerations
| Feature | Laminate Flooring Benefits for Pets | Considerations |
|---|---|---|
| Scratch Resistance | Durable wear layer (AC3 or higher recommended) | Nails may still cause scratches over time |
| Pet Safety | Generally safe for pets; low VOC options available | Can be slippery; use rugs to improve traction |
| Maintenance | Easy to clean; resists stains from fur, drool, and minor spills | Clean pet accidents promptly to prevent moisture |
| Water Resistance | Water-resistant options available, good for minor spills | Not fully waterproof; consider alternatives for high-moisture needs |
Final Note
Laminate flooring can be a great, pet-friendly choice due to its scratch resistance and ease of cleaning, but it’s important to choose the right type and take preventive measures to avoid scratching. Higher AC-rated laminates, regular nail trimming, and using rugs can help protect your floor while ensuring a safe, comfortable environment for your pets
Q - What is Herringbone Laminated Flooring
Herringbone laminate flooring is a type of laminate flooring designed to mimic the classic herringbone pattern traditionally used with wood flooring. The herringbone pattern consists of rectangular planks arranged in a distinctive V-shaped, zigzag layout that resembles the bones of a fish (hence the name “herringbone”). This pattern creates an elegant, visually striking look that adds texture, depth, and sophistication to a space.
Key Features of Herringbone Laminate Flooring
Patterned Design: Unlike standard straight-plank laminate flooring, herringbone laminate comes in planks or smaller boards specifically cut to be laid in a herringbone pattern. Each plank interlocks with the next at a 90-degree angle, creating the signature V-shape.
Realistic Wood Look: Herringbone laminate is made to replicate the appearance of natural wood, offering realistic grain patterns, colors, and textures. High-quality options closely mimic the look of traditional hardwood herringbone flooring.
Durability and Low Maintenance: Like other laminate flooring, herringbone laminate has a protective wear layer that resists scratches, stains, and fading. This makes it ideal for high-traffic areas or homes with pets and children, as it combines the elegance of a herringbone design with the practical benefits of laminate.
Cost-Effective Alternative to Hardwood: Herringbone laminate flooring offers a more affordable option compared to genuine herringbone hardwood flooring, making it accessible for those who want a luxurious look on a budget.
Advantages of Herringbone Laminate Flooring
- Aesthetic Appeal: The herringbone pattern adds a sophisticated, timeless look that enhances both modern and traditional interior styles. It’s a great way to make any room look more upscale and visually interesting.
- Variety of Colors and Textures: Available in a range of wood tones, finishes, and textures, herringbone laminate can suit diverse design preferences, from light, rustic wood looks to dark, refined finishes.
- Ease of Installation: Many herringbone laminate options use a click-lock system, making them easier to install compared to traditional herringbone hardwood that requires glue or nails.
- Durable and Pet-Friendly: The protective wear layer on laminate herringbone flooring makes it resistant to everyday wear and tear, scratches, and stains.
Installation of Herringbone Laminate Flooring
- Pre-Cut Planks: Herringbone laminate planks are usually pre-cut into smaller sizes, specifically for the herringbone pattern, making them easier to work with than trying to achieve the same effect with standard planks.
- Click-Lock System: Most herringbone laminates come with a click-lock system, making it a floating floor that doesn’t need to be glued or nailed down. This installation method is faster and can be DIY-friendly.
- Alignment: Careful alignment and measuring are essential to ensure the V-shape pattern is consistent and aligned across the room. Some people find that using a professional installer is beneficial for achieving precise alignment.
Herringbone Laminate Flooring vs. Traditional Laminate
| Feature | Herringbone Laminate Flooring | Traditional Laminate Flooring |
|---|---|---|
| Pattern | Distinctive herringbone, zigzag V-shape | Straight-plank installation, no pattern required |
| Installation | Smaller, pre-cut planks; often requires precise alignment | Standard planks with simpler, straightforward layout |
| Visual Appeal | Elegant, adds texture and visual depth | Clean, streamlined look |
| Cost | Slightly higher than traditional laminate due to pattern | Typically more affordable |
Final Note
Herringbone laminate flooring combines the classic, stylish look of a herringbone pattern with the affordability, durability, and low maintenance of laminate. It’s an excellent choice for those seeking an upscale design feature without the higher cost and upkeep associated with traditional hardwood herringbone floors.
Q - What is a Laminate Floor Installation Kit
A Laminate Floor Installation Kit is a set of tools specifically designed to make the process of installing laminate flooring easier and more efficient. These kits typically include all the essential tools needed to install a floating laminate floor with a click-lock or tongue-and-groove system. Using an installation kit helps ensure that each plank is positioned correctly, tightly locked in place, and leaves a professional-looking finish.
Common Components of a Laminate Floor Installation Kit
Tapping Block
- Purpose: The tapping block helps tap planks into place without damaging the edges.
- How to Use: Place the tapping block along the edge of the laminate plank, and gently tap it with a mallet or hammer to move the plank into place. The block evenly distributes the force, protecting the edges from chipping or breaking.
Pull Bar
- Purpose: The pull bar is used to fit planks together, especially along walls or in tight spaces where a tapping block cannot be used.
- How to Use: Insert the hooked end of the pull bar over the edge of the plank, and tap the opposite end with a mallet. This pulls the plank into place without requiring direct contact with the edges, preventing damage.
Spacers
- Purpose: Spacers help maintain the necessary expansion gap between the laminate planks and the walls. Laminate floors need this gap to expand and contract with changes in temperature and humidity.
- How to Use: Position spacers along the perimeter of the room against the wall as you install each row of planks. Once the installation is complete, remove the spacers before adding baseboards or moldings to cover the gap.
Rubber Mallet (sometimes included)
- Purpose: A rubber mallet is used with the tapping block and pull bar to apply gentle force without damaging the laminate.
- How to Use: Lightly tap the tapping block or pull bar to move planks into place. The soft rubber prevents any dents or scratches on the laminate.
Additional Tools You May Need (Not Always Included)
- Utility Knife: For trimming underlay or vapor barrier if needed.
- Measuring Tape: To measure and cut planks to fit at the end of rows or in tight spaces.
- Saw (Jigsaw or Laminate Cutter): To make precise cuts on the laminate planks as needed, especially around doorways or corners.
- Pencil and Square: To mark cutting lines on planks for precise cuts.
Benefits of Using a Laminate Floor Installation Kit
- Protects the Flooring: The tapping block and pull bar help you fit planks together without chipping or damaging edges, resulting in a smooth, professional finish.
- Ensures Proper Spacing: Spacers make it easy to maintain the necessary expansion gap around the perimeter of the room, which is critical for the floor’s durability.
- Simplifies Installation: The kit provides essential tools designed for laminate flooring, making the installation process faster and easier, even for DIYers.
- Cost-Effective: Installation kits are relatively inexpensive and include reusable tools that can be kept for future projects.
How to Use a Laminate Floor Installation Kit
- Lay the Underlay: Before installing the laminate, lay down any necessary underlay according to the manufacturer’s instructions.
- Start Laying Planks: Begin placing laminate planks along the wall, using spacers to maintain an expansion gap.
- Tap Planks Together: Use the tapping block and rubber mallet to gently tap each plank into place, ensuring a tight fit with the adjacent plank.
- Use the Pull Bar for Tight Spaces: In areas where the tapping block can’t be used, such as along walls or near doorways, use the pull bar to pull planks into place.
- Finish and Remove Spacers: Once the entire floor is installed, remove all spacers before installing baseboards or quarter-round moldings to cover the expansion gap.
Summary of Common Kit Components
| Tool | Purpose | How to Use |
|---|---|---|
| Tapping Block | Taps planks into place without damaging edges | Place along plank edge; tap gently with mallet |
| Pull Bar | Fits planks in tight spaces and along walls | Hook over plank; tap with mallet to pull into place |
| Spacers | Maintains expansion gap around room perimeter | Place between planks and walls; remove after install |
| Rubber Mallet | Applies force without damaging laminate | Use with tapping block or pull bar for gentle tapping |
Final Note
A laminate floor installation kit is an invaluable toolset for achieving a professional-looking laminate floor installation. It simplifies the process, ensures the planks are securely locked, and helps protect the flooring from damage during installation, making it a must-have for both DIYers and professionals
Q - How long do Laminate Floors last
Laminate floors can last anywhere from 10 to 30 years or even longer, depending on several factors such as quality, usage, and maintenance. Here’s a breakdown of what influences the lifespan of laminate flooring and how you can maximize it:
1. Quality of the Laminate Flooring
- Higher-Quality Laminate: Premium laminate flooring with a higher AC rating (e.g., AC3 or higher) is made with thicker wear layers and more durable materials, designed to withstand heavier foot traffic and wear. High-quality laminate flooring typically lasts 15 to 30 years.
- Lower-Quality Laminate: Budget laminate flooring with thinner wear layers or lower AC ratings (e.g., AC1 or AC2) may not hold up as well in high-traffic areas and could wear down more quickly, often lasting around 10 to 15 years.
2. AC Rating
- AC Ratings indicate the durability and wear resistance of laminate flooring. The higher the AC rating, the better suited the flooring is for high-traffic or commercial use. Here’s a rough estimate of how long laminate floors might last based on AC rating:
- AC1 – Light Residential: 10-15 years (low-traffic areas like bedrooms).
- AC2 – General Residential: 10-20 years (moderate-traffic areas like living rooms).
- AC3 – Heavy Residential / Light Commercial: 15-25 years (high-traffic areas or light commercial).
- AC4 – General Commercial: 20-30 years (offices, waiting rooms).
- AC5 – Heavy Commercial: 25+ years (high-traffic commercial spaces).
3. Installation Quality
- Proper Installation: A well-installed laminate floor with the correct underlay and expansion gaps will be less prone to warping, buckling, or gaps, which can shorten its lifespan.
- Subfloor Preparation: Installing laminate on a clean, dry, and level subfloor can prevent many issues and increase durability. Moisture issues in the subfloor can lead to swelling and damage, reducing the floor’s longevity.
4. Maintenance and Care
- Regular Cleaning: Sweeping, vacuuming, and lightly damp-mopping the floor will prevent scratches from dirt and debris, which can wear down the surface over time.
- Preventing Moisture Exposure: Laminate flooring is not fully waterproof, so avoiding spills and moisture exposure is key. Water-resistant laminate can handle minor spills, but long-term exposure to moisture can cause the planks to swell and warp, reducing lifespan.
- Furniture Protection: Using furniture pads and avoiding dragging heavy items across the floor can prevent scratches and dents, extending the life of the laminate.
5. Traffic and Usage
- Residential vs. Commercial Use: In a typical residential setting, laminate flooring in bedrooms, living rooms, or dining areas can last longer due to less frequent use. In commercial settings with heavy foot traffic, such as retail stores or offices, even high-quality laminate may experience faster wear and tear.
- Pets and Kids: Households with pets or children may experience faster wear due to scratches, spills, and higher activity levels. However, choosing laminate with a higher AC rating can help mitigate this.
How to Maximize the Lifespan of Laminate Flooring
- Choose the Right AC Rating: For high-traffic areas or households with pets, select a laminate with at least an AC3 or AC4 rating.
- Keep the Floor Clean: Regularly sweep or vacuum to prevent debris from scratching the surface, and mop sparingly to avoid moisture buildup.
- Use Area Rugs: Placing rugs in high-traffic zones or under furniture can reduce wear and help protect the laminate.
- Avoid Excess Water: Clean spills quickly and use only a damp mop with a laminate-safe cleaner to avoid swelling or damage.
- Protect from UV Light: Use curtains or blinds to limit direct sunlight, as UV exposure can cause some laminate floors to fade over time.
Lifespan Estimate Table for Laminate Floors
| AC Rating | Usage Type | Expected Lifespan | Recommended Areas |
|---|---|---|---|
| AC1 | Light Residential | 10-15 years | Bedrooms, guest rooms |
| AC2 | General Residential | 10-20 years | Living rooms, dining rooms |
| AC3 | Heavy Residential / Light Commercial | 15-25 years | Kitchens, entryways, small offices |
| AC4 | General Commercial | 20-30 years | Offices, waiting rooms, boutiques |
| AC5 | Heavy Commercial | 25+ years | High-traffic commercial areas like retail |
Final Note
With the right choice of AC rating, proper installation, and consistent care, laminate flooring can last well beyond a decade. By protecting it from moisture, using rugs in high-traffic areas, and performing regular maintenance, you can enjoy a durable and attractive floor for many years
Q - What is the difference between Laminate and Engineered Hardwood Floors
Laminate and engineered hardwood floors are both popular alternatives to solid hardwood, offering a similar look at a more affordable price. However, they differ significantly in terms of construction, durability, appearance, installation, and maintenance. Here’s a breakdown of the main differences between the two flooring types.
1. Construction and Material Composition
- Laminate Flooring:
- Made from multiple layers of synthetic materials with a high-density fiberboard (HDF) or medium-density fiberboard (MDF) core.
- The top layer is a photographic image layer designed to mimic wood, stone, or tile, covered by a transparent wear layer that protects against scratches and stains.
- Engineered Hardwood Flooring:
- Made from real wood, with a top layer of hardwood veneer (such as oak, maple, or walnut) bonded to multiple layers of plywood or HDF underneath.
- The hardwood veneer layer gives engineered wood its authentic wood appearance, while the plywood core provides stability and reduces expansion and contraction.
2. Appearance and Realism
- Laminate:
- The photographic layer allows for a wide range of looks, including various wood, stone, and tile designs. However, it may lack the texture and depth of real wood.
- Some high-quality laminates have textured finishes that make them more realistic, but the wood grain is still printed rather than natural.
- Engineered Hardwood:
- Looks and feels like real wood because the top layer is genuine hardwood. Each plank has a unique grain pattern and texture, providing the warmth and richness of real wood.
- Available in various wood species, finishes, and textures, offering more authenticity compared to laminate.
3. Durability and Scratch Resistance
- Laminate:
- Known for its high scratch resistance due to the tough wear layer, making it suitable for homes with pets or high traffic. Laminate is highly resistant to dents and fading.
- However, once damaged, laminate can’t be repaired or refinished and may need to be replaced if scratched or worn.
- Engineered Hardwood:
- Less resistant to scratches and dents than laminate, but its real wood surface can be sanded and refinished (though only a limited number of times, depending on the thickness of the veneer).
- With proper care, engineered hardwood can handle moderate traffic but may show more wear over time compared to laminate.
4. Water and Moisture Resistance
- Laminate:
- Not waterproof, though some water-resistant varieties are available. Prolonged exposure to moisture can cause the HDF core to swell and warp.
- Generally suitable for living rooms, bedrooms, and hallways, but not recommended for high-moisture areas like bathrooms or basements.
- Engineered Hardwood:
- More moisture-resistant than solid hardwood due to its plywood core but still sensitive to water. Engineered wood can handle occasional spills but should not be exposed to standing water.
- Can be installed in basements and kitchens but not ideal for bathrooms or other high-humidity areas.
5. Installation
- Laminate:
- Typically uses a click-lock floating floor installation system, making it easy and DIY-friendly. Laminate is laid over underlay and does not need to be attached to the subfloor.
- Can be installed over most existing floors, provided the surface is level.
- Engineered Hardwood:
- Can be installed in multiple ways: as a floating floor with a click-lock system, glued down, or nailed/stapled, depending on the product.
- Installation methods vary, with glued and nailed installations often requiring professional help, especially for larger areas.
6. Maintenance and Care
- Laminate:
- Low-maintenance, with easy cleaning using a broom or vacuum and occasional damp mopping. Laminate does not require polishing or refinishing.
- Avoid excessive water when cleaning, as laminate is vulnerable to moisture.
- Engineered Hardwood:
- Requires more careful maintenance to prevent scratches, dents, and moisture damage. Cleaning with a soft broom, vacuum, or hardwood-safe cleaner is recommended.
- Can be refinished once or twice, depending on the thickness of the wood veneer, which can extend its life.
7. Lifespan and Resale Value
- Laminate:
- Typically lasts 10-20 years with proper care, but may need replacement if it shows signs of wear, as it cannot be refinished.
- Adds less resale value compared to engineered hardwood.
- Engineered Hardwood:
- Can last 20-30 years or more with proper maintenance, and the ability to refinish gives it a longer potential lifespan.
- Considered more desirable for home resale due to its real wood surface and authenticity.
8. Cost
- Laminate:
- Generally more affordable than engineered hardwood, making it a budget-friendly choice for those who want the look of wood without the higher price tag.
- Engineered Hardwood:
- Costs more than laminate, especially for thicker veneers or exotic wood species, but it offers a more authentic appearance and higher resale value.
Summary Comparison Table
| Feature | Laminate Flooring | Engineered Hardwood Flooring |
|---|---|---|
| Construction | Synthetic layers with HDF/MDF core and photo layer | Real wood veneer with plywood or HDF core |
| Appearance | Realistic look, but lacks true wood grain depth | Genuine wood look and feel, unique grain patterns |
| Durability | Highly scratch-resistant, not refinishable | Less scratch-resistant but can be refinished |
| Moisture Resistance | Water-resistant options, but not fully waterproof | More moisture-resistant than solid wood, but not waterproof |
| Installation | Click-lock, floating floor, easy DIY | Floating, glue-down, or nail-down; some DIY |
| Maintenance | Low-maintenance, easy to clean | More care required, can be refinished |
| Lifespan | 10-20 years | 20-30 years or more |
| Cost | More affordable | Higher, varies by veneer thickness and wood type |
| Resale Value | Moderate | Higher due to real wood surface |
Final Note
Choosing between laminate and engineered hardwood depends on your budget, desired look, durability needs, and the specific rooms where the flooring will be installed. Laminate is ideal for those on a budget seeking low maintenance and high scratch resistance, while engineered hardwood offers an authentic wood feel, longer lifespan, and higher resale value for those willing to invest a bit more
Q - Where can and cannot Laminate Floor be installed
Laminate flooring is versatile and can be installed in many areas of a home, but there are some limitations due to its sensitivity to moisture and humidity. Here’s a breakdown of where laminate flooring can and cannot be installed:
Where Laminate Flooring Can Be Installed
Living Rooms and Bedrooms
- Ideal for low to moderate foot traffic areas and dry conditions.
- Laminate flooring provides a warm, attractive look that complements various design styles and is easy to maintain in these spaces.
Hallways and Entryways
- Suitable for high-traffic areas if you choose a durable, higher AC-rated laminate (AC3 or above).
- Place rugs or mats near entrances to reduce dirt, moisture, and debris that can cause scratches over time.
Dining Rooms
- Laminate can handle dining room traffic, and it’s easy to clean up small spills, making it a practical choice for dining spaces.
- Use protective pads on dining chairs to prevent scratches from moving furniture.
Home Offices
- Ideal for creating a professional and clean look, and it holds up well in areas with low to moderate foot traffic.
- Compatible with office furniture, such as rolling chairs, if used with protective mats.
Kitchens (With Caution)
- Laminate can be installed in the kitchen if it’s water-resistant and spills are promptly cleaned up to prevent moisture from seeping into the seams.
- Use water-resistant laminate or install a protective moisture barrier under the laminate if installing in the kitchen.
Basements (With Restrictions)
- Laminate can be installed in basements that are dry and well-ventilated, and if the subfloor is properly prepared with a moisture barrier.
- Avoid installing laminate in basements prone to flooding or high humidity, as excess moisture can cause warping and swelling.
Where Laminate Flooring Cannot Be Installed
Bathrooms
- Laminate is not recommended for bathrooms due to the high humidity and potential for standing water, which can cause the planks to swell, warp, or delaminate.
- Even water-resistant laminate is not suitable for full bathrooms where water exposure is frequent and prolonged.
Laundry Rooms
- Laundry rooms are prone to spills, leaks, and high humidity, which can damage laminate flooring. A leak or water spill can easily reach the seams and cause swelling.
- Vinyl or tile flooring is a better option for laundry rooms, as they can handle higher moisture levels.
Saunas or Pool Areas
- Due to the extreme moisture and humidity levels, laminate flooring is not appropriate for saunas or areas surrounding pools or hot tubs.
- These areas require fully waterproof flooring like tile or certain types of vinyl.
Outdoor Spaces or Sunrooms
- Laminate is not designed for outdoor use or areas with high exposure to sunlight and temperature fluctuations, which can cause fading and expansion/contraction issues.
- In sunrooms, the heat and UV rays can cause laminate to fade or expand, so it’s better to use UV-resistant flooring options.
Tips for Installing Laminate in Certain Areas
- Use Moisture Barriers: When installing over concrete or in moisture-prone areas (like basements or kitchens), use a moisture barrier under the laminate to protect against moisture from below.
- Select Water-Resistant Laminate: If installing in a slightly damp area (like a dry basement or kitchen), consider water-resistant laminate options designed to handle minor moisture exposure.
- Maintain Expansion Gaps: Always leave an expansion gap around the perimeter of the room to allow the laminate to expand and contract naturally, especially in areas where temperature and humidity may fluctuate.
Summary Table
| Room/Area | Can Laminate Be Installed? | Notes |
|---|---|---|
| Living Room | Yes | Suitable for most types; AC3 or higher recommended for high-traffic. |
| Bedroom | Yes | Ideal for low-traffic areas. |
| Hallway/Entryway | Yes | Durable AC3+ laminate recommended; use rugs at entry points. |
| Dining Room | Yes | Suitable; use chair pads to prevent scratches. |
| Home Office | Yes | Works well, compatible with office furniture. |
| Kitchen | With Caution | Use water-resistant laminate; clean spills immediately. |
| Basement | With Restrictions | Only install in dry basements with a moisture barrier. |
| Bathroom | No | Not suitable due to high moisture and potential for standing water. |
| Laundry Room | No | Risk of water exposure; better to use waterproof options like tile or vinyl. |
| Saunas/Pool Areas | No | Extreme moisture and humidity make laminate unsuitable. |
| Outdoor Spaces | No | Laminate is not designed for outdoor conditions or direct sunlight exposure. |
| Sunroom | No | UV exposure and temperature swings can cause fading and damage. |
Final Note
Laminate flooring is versatile but not suitable for areas with high moisture, humidity, or direct exposure to water. For areas like kitchens and basements, consider using water-resistant laminate and install a moisture barrier for added protection. In areas with frequent moisture, such as bathrooms and laundry rooms, it’s better to choose fully waterproof options like vinyl or tile to ensure long-term durability
Q - How do I clean my Laminate Floor - Best Practices
Cleaning laminate flooring is relatively easy, but it requires specific techniques to prevent damage and maintain its appearance. Here are some best practices for cleaning laminate floors to keep them looking fresh and scratch-free.
1. Regular Sweeping or Vacuuming
- Frequency: Daily or as needed, depending on foot traffic.
- Method: Use a soft-bristled broom or a vacuum with a hard floor setting (without a beater bar) to remove dirt, dust, and pet hair. Dirt particles can act like sandpaper on laminate floors, causing micro-scratches over time.
2. Dry or Damp Mopping
- Frequency: Weekly or as needed for deeper cleaning.
- Method: Use a microfiber mop or a damp cloth mop with a laminate-safe cleaner. Avoid soaking the mop—wring it out well to ensure it’s only slightly damp. Excess water can seep into the seams and cause swelling or warping.
- Laminate Floor Cleaner: Use a cleaner specifically formulated for laminate floors. Avoid using harsh chemicals, bleach, or abrasive cleaners, as they can damage the wear layer.
3. Spot Cleaning for Spills and Stains
- Quick Action: Wipe up any spills immediately with a dry or slightly damp cloth to prevent moisture from penetrating the seams.
- Mild Soap Solution for Tough Stains: For sticky spots or stains, use a mild soap and water mixture. Dampen a cloth with the solution and gently rub the stain, then dry the area with a clean cloth.
- Avoid Abrasive Tools: Never use steel wool, scouring pads, or abrasive sponges, as they can scratch the surface.
4. Avoid Excess Water
- Use Minimal Moisture: Laminate floors are not fully waterproof, so using too much water can lead to swelling and warping. Never let water sit on the surface.
- Avoid Wet Mopping or Steam Cleaners: Steam cleaners and wet mops can damage laminate flooring by forcing moisture into the planks. Stick to dry mopping or very lightly dampened mops.
5. Use a Laminate-Friendly Cleaner
- Avoid Ammonia or Vinegar Solutions: These can dull or damage the laminate’s finish over time. Stick to cleaners specifically labeled for laminate floors, or make a gentle solution if a laminate cleaner is unavailable.
- DIY Cleaner (Optional): A simple mixture of water and a few drops of mild dish soap can work well. Make sure to wipe the area dry after cleaning.
6. Buffing for Shine
- Microfiber Cloth: Use a clean, dry microfiber cloth to buff the floor after mopping. This will help remove any streaks and bring out the natural shine of the laminate.
- Avoid Wax or Polish: Laminate floors have a factory-applied finish and do not require waxing or polishing. Wax or polish products can create a buildup on the surface, making it look dull or streaky.
7. Protecting the Floor from Scratches and Damage
- Furniture Pads: Place felt pads or furniture coasters under heavy furniture to prevent scratches. Avoid dragging furniture across the floor.
- Use Area Rugs and Mats: Place mats at entryways to capture dirt and debris before they reach the floor. Area rugs in high-traffic areas can also help reduce wear.
- Trim Pet Nails: Keep pet nails trimmed to avoid scratches on the laminate surface.
8. UV Protection
- Curtains or Blinds: Prolonged exposure to direct sunlight can cause laminate floors to fade over time. Use curtains or blinds to protect the floor from UV rays, especially in rooms with large windows.
Summary of Best Practices
| Task | Frequency | Method | Tips |
|---|---|---|---|
| Sweeping/Vacuuming | Daily or as needed | Soft-bristled broom or vacuum with hard floor setting | Prevents scratches from dirt/debris |
| Dry/Damp Mopping | Weekly or as needed | Microfiber mop, slightly damp; use laminate-safe cleaner | Avoid excess water; no wet mopping |
| Spot Cleaning | As needed | Wipe spills immediately; mild soap solution for tough stains | Avoid abrasive tools |
| Buffing for Shine | After mopping | Dry microfiber cloth | No wax or polish required |
| UV Protection | Ongoing | Use curtains or blinds | Reduces fading from sunlight |
Final Note
Cleaning laminate flooring is easy with the right techniques. Regular sweeping or vacuuming, occasional damp mopping, and immediate spot cleaning for spills will keep your floors looking their best. Avoid excess water and harsh chemicals, and use a laminate-safe cleaner to maintain the floor’s finish and prolong its life
Q - Do the board thickness matter when choosing my new Laminate floor
Yes, board thickness is an important factor to consider when choosing laminate flooring. The thickness of laminate boards generally ranges from 6 mm to 12 mm, and each thickness level offers different benefits in terms of stability, durability, sound insulation, and overall feel. Here’s how board thickness impacts the performance and appearance of laminate flooring and why it matters:
1. Durability and Stability
- Thicker Boards (10–12 mm): Thicker laminate boards provide increased stability, making the floor feel more solid and durable underfoot. They are better able to withstand impact, heavy furniture, and high foot traffic, which is especially beneficial in areas like living rooms, hallways, and kitchens.
- Thinner Boards (6–8 mm): Thinner boards are typically more affordable, but they may be less durable and stable. They can feel more flexible and are more susceptible to denting or bending if installed over an uneven subfloor.
2. Sound Insulation
- Thicker Laminate: Thicker boards provide better sound insulation, making the floor quieter to walk on. This is particularly valuable in multi-level homes or apartments, where noise reduction between floors is important.
- Thin Laminate: Thinner boards have less natural sound dampening, so they may produce a “hollow” or “clicky” sound when walked on. Using a good underlay can help improve sound insulation for thinner boards.
3. Feel and Comfort
- Thicker Boards: Thicker laminate floors provide a more substantial feel underfoot, similar to hardwood flooring. This makes them more comfortable to walk on and gives a premium feel to the room.
- Thinner Boards: Thinner laminate may feel less substantial and provide less comfort, especially if installed without a good-quality underlay.
4. Ease of Installation and Subfloor Tolerance
- Thicker Laminate: Thicker boards are typically more forgiving when installed over minor subfloor imperfections, helping to achieve a smoother, more even look. This can reduce the need for extensive subfloor preparation.
- Thinner Laminate: Thinner boards require a very flat subfloor to prevent bending or buckling. Any imperfections in the subfloor are more likely to show, so additional subfloor preparation may be necessary.
5. Appearance and Realism
- Thicker Boards: Thicker laminate often has beveled edges or embossed textures, adding depth and a more realistic wood appearance. This can make the laminate floor look and feel closer to real hardwood.
- Thinner Boards: Thinner laminate may lack these finishing touches, making the flooring look less realistic compared to thicker options. However, some high-quality thinner laminates still achieve a good visual effect.
6. Cost Considerations
- Thicker Laminate (More Expensive): Due to the increased stability, durability, and sound insulation, thicker laminate boards typically cost more. However, they are often a worthwhile investment in high-traffic areas or if you want a more comfortable and realistic feel.
- Thinner Laminate (More Affordable): Thinner boards are generally less expensive, making them a budget-friendly option. They can be ideal for low-traffic rooms or if you plan to replace the flooring in a few years.
Which Thickness Should You Choose?
- 6–8 mm: Suitable for low-traffic areas (like bedrooms or guest rooms) and budget-conscious projects. If you choose thinner laminate, ensure the subfloor is level, and consider using a high-quality underlay for added comfort and sound insulation.
- 10–12 mm: Recommended for high-traffic areas (like living rooms, kitchens, and hallways) and if you’re looking for more stability, sound insulation, and a realistic wood feel. Thicker laminate is a great choice for long-term installations, where comfort and durability are important.
Summary of Laminate Flooring Thickness Benefits
| Thickness | Best Use | Benefits | Considerations |
|---|---|---|---|
| 6–7 mm | Low-traffic areas, budget installs | More affordable, suitable for low-impact areas | Requires very flat subfloor; less sound insulation |
| 8–10 mm | Medium-traffic areas | Balance of cost, comfort, and durability | Moderate sound insulation; good for most rooms |
| 10–12 mm | High-traffic areas, long-term use | Maximum durability, best sound insulation, realistic feel | Higher cost; premium option for high-use spaces |
Final Note
While laminate flooring of any thickness can look great and perform well, thicker boards generally provide greater stability, durability, sound insulation, and comfort. For high-traffic areas or rooms where you want a premium look and feel, investing in a thicker laminate (10–12 mm) is recommended. For budget projects or low-traffic areas, a thinner laminate with proper underlay can still be a good choice
Q - Why is Laminated Flooring so popular
Laminate flooring has become a popular choice for both residential and commercial spaces due to its blend of affordability, durability, aesthetics, and easy maintenance. Here are the key reasons why laminate flooring is so widely chosen:
1. Affordability
- Cost-Effective: Laminate flooring is generally more affordable than hardwood, tile, or stone flooring, making it an attractive option for budget-conscious homeowners.
- Value for Money: Laminate offers a great balance of price and quality, providing a realistic wood or tile look without the high cost of natural materials.
2. Realistic Appearance
- High-Quality Wood and Stone Looks: With advanced printing technology, laminate can mimic the appearance of real wood, stone, or tile very closely. Many laminates even have textured surfaces, which enhance the realistic look and feel.
- Variety of Styles: Laminate flooring is available in a broad range of colors, patterns, and finishes, allowing customers to achieve virtually any look they desire—from traditional hardwood to modern stone effects.
3. Durability and Scratch Resistance
- Scratch-Resistant Surface: The wear layer on laminate is highly resistant to scratches, stains, and dents, making it ideal for homes with kids, pets, and high foot traffic.
- High Abrasion Criteria (AC) Ratings: Laminate flooring with a higher AC rating (AC3 or above) is durable enough for high-traffic residential areas and even some commercial spaces. This means it can withstand everyday wear and tear effectively.
4. Easy Maintenance
- Low Maintenance Requirements: Laminate is easy to keep clean, requiring only regular sweeping, occasional damp mopping, and spot cleaning for spills. It doesn’t require polishing, waxing, or refinishing like hardwood.
- Stain and Fade Resistant: The wear layer protects against stains, fading, and discoloration, even in rooms with high sunlight exposure.
5. Simple Installation
- DIY-Friendly: Laminate flooring is often installed using a click-lock or tongue-and-groove system, which allows it to be installed as a floating floor without nails or glue. This makes it accessible to DIYers and reduces installation costs.
- Can Be Installed Over Existing Floors: Laminate can often be installed directly over existing flooring, such as vinyl or tile, as long as the subfloor is level. This can save time and effort during renovations.
6. Versatility in Use
- Suitable for Various Rooms: Laminate can be installed in living rooms, bedrooms, dining rooms, hallways, and even kitchens (if water-resistant laminate is used). Its versatility makes it a great choice for multiple areas in a home or business.
- Water-Resistant Options: Many manufacturers now offer water-resistant or even waterproof laminate options, which expand its usability into moisture-prone areas like kitchens and basements (though bathrooms are still not ideal for standard laminate).
7. Comfort and Insulation
- Warm Underfoot: Laminate feels warmer underfoot compared to tile or stone, providing a comfortable surface in living areas and bedrooms.
- Sound Insulation with Underlay: Laminate is typically installed with an underlay, which helps absorb sound, reduces echo, and provides a slight cushion for added comfort. Thicker laminate options (10–12 mm) often have better sound insulation as well.
8. Eco-Friendly Options
- Sustainable Manufacturing: Many laminate flooring brands use recycled or sustainably sourced wood in their core layers, reducing environmental impact.
- Low VOC Options Available: Many laminate products meet low VOC (Volatile Organic Compound) standards, ensuring better indoor air quality. Certifications like GREENGUARD and FloorScore help buyers identify eco-friendly options.
9. Improved Resale Value
- Adds Appeal to Homes: Laminate flooring can enhance the look of a home, making it more attractive to potential buyers and increasing its resale value. While it doesn’t add as much value as hardwood, it is still a desirable feature for many buyers.
10. Long Lifespan with Proper Care
- Lasts Up to 20 Years or More: High-quality laminate flooring, especially with proper care and maintenance, can last 15-20 years or longer. This longevity provides good value over time, as it can withstand years of use in busy households.
Summary of Laminate Flooring’s Popularity Factors
| Factor | Description |
|---|---|
| Affordability | More budget-friendly than hardwood or tile, offering great value for money |
| Realistic Appearance | Advanced printing and textures mimic wood and stone looks |
| Durability | Scratch-resistant and high AC-rated options available for durability |
| Easy Maintenance | Simple to clean with no waxing or refinishing required |
| Easy Installation | Click-lock systems allow for DIY installation and floating floor setup |
| Versatile Usage | Suitable for many rooms, with water-resistant options for kitchens and basements |
| Comfort | Warm and comfortable underfoot, with sound insulation benefits |
| Eco-Friendly Options | Many products use sustainable materials and have low VOC emissions |
| Resale Value | Enhances the appeal of homes and provides a polished look |
| Long Lifespan | High-quality laminate can last 15-20 years or more with proper care |
Final Note
Laminate flooring’s popularity stems from its ability to provide the look of natural wood or stone at a fraction of the cost, with added durability, ease of maintenance, and installation. With a wide range of styles and improvements in water resistance, laminate is a versatile and attractive flooring option for nearly any space. Its affordability, combined with these benefits, makes it a top choice for both homeowners and businesses
Q - Is Laminate flooring considered to be Hypoallergenic?
Yes, laminate flooring is generally considered to be hypoallergenic and can be a good choice for people with allergies or respiratory sensitivities. Here’s why laminate flooring is hypoallergenic and how it can contribute to a healthier indoor environment:
1. Non-Porous Surface
- Dust and Allergen Resistance: Laminate flooring has a smooth, non-porous surface that doesn’t trap dust, pet dander, pollen, or other allergens like carpet does. This makes it easier to keep allergen levels low in the home.
- Easy to Clean: Regular sweeping and damp mopping are usually all that’s needed to keep laminate flooring free of allergens, dust, and dirt, making it a low-maintenance option for allergy sufferers.
2. No Dust Mites or Mold Growth
- Dust Mite Prevention: Since laminate doesn’t hold onto dust and debris, it doesn’t provide a hospitable environment for dust mites, which thrive in softer surfaces like carpet.
- Resistance to Mold and Mildew: Laminate’s moisture-resistant top layer discourages the growth of mold and mildew, common allergens that can affect indoor air quality. However, it’s still important to clean up spills promptly to prevent moisture from seeping into the seams.
3. Low VOC (Volatile Organic Compounds) Options
- Healthier Indoor Air Quality: Many laminate flooring options are certified as low-VOC, meaning they emit minimal volatile organic compounds. Low-VOC products are better for indoor air quality, reducing the risk of respiratory irritation or headaches associated with chemical off-gassing.
- Certifications: Look for certifications like FloorScore or GREENGUARD that indicate the flooring meets stringent air quality standards and is safe for indoor use.
4. Hypoallergenic Underlayment Options
- Allergen-Blocking Underlayment: Some laminate underlayments are specifically designed to be hypoallergenic, providing an extra layer of protection against allergens. These underlayments are often antimicrobial and prevent mold and mildew growth.
- Sound Insulation with Added Benefits: Quality underlayments can also reduce noise and improve comfort without introducing allergenic materials, making them a great addition to hypoallergenic flooring.
5. No Need for Harsh Cleaners
- Laminate-Friendly Cleaners: Laminate flooring can be kept clean with a simple routine, often only requiring a microfiber mop and water, or a mild, laminate-safe cleaner. This reduces the need for harsh chemicals that may aggravate allergies or sensitivities.
Best Practices for Keeping Laminate Flooring Hypoallergenic
- Regular Cleaning: Sweep or vacuum regularly with a hard floor setting (without a beater bar) to prevent dust and allergens from accumulating.
- Use Hypoallergenic Underlayment: Consider underlayments with antimicrobial properties, which help keep the space below the floor dry and prevent allergens.
- Choose Low-VOC Laminate: Look for certified low-VOC options to minimize chemical emissions.
- Avoid Excess Moisture: Prevent moisture buildup, which can lead to mold and mildew, by cleaning spills immediately and using a damp, not wet, mop for cleaning.
Summary of Hypoallergenic Benefits
| Benefit | Description |
|---|---|
| Non-Porous Surface | Doesn’t trap dust, dander, or pollen; easy to clean |
| No Dust Mites or Mold | Resists dust mites and discourages mold/mildew growth |
| Low VOC Options | Low chemical emissions, improving indoor air quality |
| Hypoallergenic Underlay | Additional barrier against allergens; antimicrobial and moisture-resistant |
| Minimal Cleaning Chemicals | Laminate-friendly cleaners or water is usually sufficient |
Final Note
Laminate flooring is an excellent hypoallergenic option due to its non-porous surface, easy maintenance, and resistance to allergens. By choosing a low-VOC, hypoallergenic underlayment and using gentle cleaning methods, laminate can significantly contribute to a healthier home environment, making it a top choice for allergy sufferers and those looking to improve indoor air quality
Q - Is Laminated Flooring Environmentally Friendly
Laminate flooring can be considered environmentally friendly, especially when produced by manufacturers that prioritize sustainable practices. Here’s how laminate flooring can be an eco-friendly choice, as well as some factors to consider:
1. Made from Recycled and Renewable Materials
- Wood Byproducts: Laminate flooring is typically made from high-density fiberboard (HDF) or medium-density fiberboard (MDF), which consists of wood fibers sourced from sawmill waste or recycled wood materials. This reduces the demand for virgin wood and helps utilize byproducts that might otherwise be discarded.
- Renewable Resources: Some manufacturers use responsibly sourced wood or certified renewable materials, which helps reduce the impact on forests.
2. Lower Environmental Impact Compared to Hardwood
- Less Wood Consumption: Laminate uses a thin photographic layer on top, instead of thick wood veneer, which means significantly less wood is required compared to solid hardwood or engineered wood. This makes laminate more sustainable in terms of material usage.
- Alternatives to Exotic Woods: Laminate flooring can replicate the look of exotic wood species without the need to harvest those trees, helping to preserve vulnerable or endangered forests.
3. Low VOC and Indoor Air Quality Certifications
- Low VOC Emissions: Many laminate flooring products are designed to be low in volatile organic compounds (VOCs), which contributes to healthier indoor air quality and reduces harmful off-gassing.
- Certifications for Air Quality: Eco-friendly laminate flooring options are often certified by organizations like FloorScore, GREENGUARD, and ECO Institute, indicating they meet rigorous standards for low emissions and indoor air quality.
4. Long Lifespan and Durability
- Extended Use Reduces Waste: High-quality laminate flooring can last 15-25 years with proper care. A long lifespan means fewer replacements, reducing the frequency of new materials and the associated environmental impact.
- Durability Reduces the Need for Repairs: Laminate’s scratch and stain resistance help it maintain its appearance, further minimizing the environmental impact of replacing or refurbishing flooring frequently.
5. Recyclable and Low-Waste Production
- Recycling Options: Some laminate flooring can be recycled, particularly if it doesn’t contain added PVC or other non-recyclable materials. However, recycling laminate flooring can be limited in some areas, so checking local facilities is recommended.
- Efficient Production: Laminate flooring production is generally energy-efficient compared to other flooring types, often using high-pressure processes that maximize material yield and minimize waste.
6. Eco-Friendly Manufacturing Processes
- Sustainable Manufacturers: Many laminate manufacturers implement eco-friendly practices, such as using renewable energy, reducing water use, and minimizing waste in production.
- Certifications for Sustainable Practices: Look for certifications like PEFC (Programme for the Endorsement of Forest Certification) or FSC (Forest Stewardship Council) to ensure the wood used in the laminate is responsibly sourced.
7. Minimal Need for Harmful Chemicals
- Easy to Clean: Laminate floors are low maintenance, usually requiring only water or mild cleaners. This reduces the need for harsh cleaning chemicals, which can harm the environment when washed away.
- No Polishing or Refinishing Required: Unlike hardwood, laminate does not need to be waxed, polished, or refinished, which reduces the use of chemicals over the floor’s life.
Potential Environmental Considerations
- Recyclability Challenges: Laminate flooring is not as easily recyclable as some other materials, such as solid wood or vinyl, due to its composition of multiple layers and synthetic resins. However, some specialized recycling facilities can handle laminate.
- End-of-Life Disposal: At the end of its life, laminate may need to be disposed of in landfills if recycling options are unavailable, which could have an environmental impact. Checking for local recycling options or upcycling the material can help mitigate this.
Tips for Choosing Eco-Friendly Laminate Flooring
- Look for Certifications: Choose products with certifications like FSC, PEFC, FloorScore, or GREENGUARD, which indicate environmentally friendly sourcing, low emissions, and sustainable manufacturing practices.
- Check for Low VOCs: Opt for laminate labeled as low VOC, which improves indoor air quality and reduces harmful emissions.
- Support Sustainable Brands: Research manufacturers that prioritize eco-friendly practices, such as using recycled materials, renewable energy, and efficient production processes.
- Opt for Long-Lasting, Durable Laminate: Choosing a high-quality, durable laminate with a higher AC rating (AC3 or above) ensures a longer lifespan, reducing the need for replacement.
Summary of Laminate Flooring’s Eco-Friendly Aspects
| Eco-Friendly Factor | Description |
|---|---|
| Recycled and Renewable Materials | Uses wood byproducts, reduces need for virgin wood, conserves natural resources |
| Lower Impact vs. Hardwood | Requires less wood, avoids harvesting exotic species, and has lower production impact |
| Low VOC Options | Certified for low emissions, improving indoor air quality and reducing off-gassing |
| Durability and Longevity | Long-lasting, reducing waste and need for frequent replacement |
| Recyclable Components | Some parts are recyclable; check local facilities for recycling options |
| Eco-Friendly Production | Many brands use sustainable practices and energy-efficient production methods |
| Minimal Harmful Chemicals | Low maintenance and no need for refinishing or harsh chemicals |
Final Note
Laminate flooring can be an environmentally friendly choice, especially when sourced from manufacturers who prioritize sustainable materials and eco-friendly practices. Its use of recycled materials, low-VOC options, and minimal maintenance requirements contribute to a reduced environmental impact. While recyclability can be challenging, choosing a durable laminate with green certifications can support a more sustainable home environment.
Q - Is Laminated flooring an affordable flooring solution
Yes, laminate flooring is considered an affordable flooring solution that offers great value for its cost. Compared to traditional hardwood, tile, and other flooring types, laminate flooring provides a budget-friendly way to achieve a stylish look without compromising on durability and ease of maintenance. Here are some reasons why laminate flooring is an affordable choice:
1. Lower Material Costs
- Cost Per Square Meter: Laminate flooring is typically more affordable than hardwood, stone, or ceramic tile. The price of laminate can range from a low to mid-range cost per square meter, making it accessible for budget-conscious homeowners.
- Variety of Price Points: Laminate flooring is available in various price points, with options to suit different budgets. You can find inexpensive laminate for basic projects or higher-quality laminate with premium finishes for a slightly higher price, all while remaining affordable compared to other flooring options.
2. Cost-Effective Installation
- DIY-Friendly: Laminate flooring is often installed using a click-lock or tongue-and-groove system, allowing it to be installed as a floating floor without nails, glue, or staples. This easy installation method makes it suitable for DIY projects, saving homeowners on professional installation fees.
- Reduced Installation Time: Even if you hire a professional installer, the installation process for laminate flooring is quicker than that of hardwood or tile, which helps lower labor costs.
3. Minimal Maintenance Costs
- No Need for Polishing or Refinishing: Unlike hardwood floors, which require periodic polishing or refinishing to maintain their appearance, laminate flooring only requires regular sweeping and occasional damp mopping. This eliminates the need for costly upkeep.
- Durability Reduces Replacement Needs: Laminate flooring is durable and scratch-resistant, especially if you choose a high AC rating (AC3 or above). Its durability means it can withstand daily wear and tear in high-traffic areas, reducing the need for repairs or replacement.
4. Long-Term Value
- Extended Lifespan for High-Quality Laminate: With proper care, high-quality laminate flooring can last 15-20 years or more, offering excellent value over time. Choosing a thicker, higher-quality laminate will increase upfront costs slightly, but the long lifespan provides more cost-effectiveness in the long run.
- Water-Resistant Options: Many laminate floors now come with water-resistant properties, making them suitable for kitchens and other moisture-prone areas. This extends their usability and life, reducing the need for costly replacements due to water damage.
5. Wide Range of Style Options at Affordable Prices
- Realistic Wood and Stone Looks: Laminate flooring offers realistic wood, stone, and tile appearances at a fraction of the cost of the real materials. This allows homeowners to achieve the aesthetic appeal of more expensive materials without the high price tag.
- Style Flexibility: With a vast range of styles, colors, and finishes, laminate offers versatility that can suit any decor style, from rustic to modern, without the premium cost of similar-looking hardwood or stone options.
6. Low Waste Production
- Cost Savings from Efficient Manufacturing: Laminate is typically manufactured using wood byproducts and efficient processes, which helps reduce waste and keeps production costs low. These savings are passed on to consumers, making laminate a budget-friendly option.
Summary of Laminate Flooring’s Affordability Benefits
| Affordability Factor | Description |
|---|---|
| Lower Material Costs | Generally more affordable per square meter than hardwood or tile |
| DIY Installation Potential | Easy click-lock system allows for DIY, reducing installation costs |
| Minimal Maintenance | No polishing or refinishing required, saving on long-term upkeep costs |
| Durability | High scratch and impact resistance reduces need for frequent repairs or replacement |
| Long-Term Value | Quality laminate can last 15-20+ years, providing long-term value for the investment |
| Stylish Variety | Mimics expensive wood and stone looks at a fraction of the cost, offering style without splurge |
Final Note
Laminate flooring is an affordable, low-maintenance, and durable flooring solution that provides long-term value. With its wide range of styles, cost-effective installation, and minimal upkeep, laminate allows homeowners to achieve a high-quality look while staying within budget.
Q - Do I need to replace existing skirting when installing laminate flooring
When installing laminate flooring, you have a few options regarding the existing skirting (also known as baseboards), and whether or not you need to replace it depends on your desired look and installation preferences. Here are your options and what to consider for each:
1. Leave Existing Skirting in Place and Use Beading/Quarter Round
- What It Involves: Keep your existing skirting in place, install the laminate flooring, and then add a beading (or quarter round molding) along the edge of the skirting to cover the expansion gap.
- Pros:
- Saves time and avoids the hassle of removing and reinstalling skirting.
- Often more cost-effective, as it doesn’t require new skirting or extensive labor.
- Cons:
- Adds an extra layer of molding, which some people may find less aesthetically pleasing.
- The added beading can slightly reduce the visual floor space along the walls.
2. Remove Existing Skirting and Reinstall It After Laminate Installation
- What It Involves: Carefully remove the skirting before installing the laminate floor. After installation, reinstall the original skirting, covering the expansion gap.
- Pros:
- Offers a cleaner, more streamlined look without needing extra beading or quarter rounds.
- Maintains the original design continuity of the room if you plan to reuse existing skirting.
- Cons:
- Removing and reinstalling skirting can be labor-intensive and may risk damaging the skirting during removal.
- This approach might require some touch-up painting or caulking, as removing skirting can sometimes damage the wall paint or plaster.
3. Replace Existing Skirting with New Skirting Boards
- What It Involves: Remove the old skirting and replace it with new skirting boards after installing the laminate flooring, covering the expansion gap.
- Pros:
- Freshens up the look of the room with new skirting that complements the new flooring.
- Offers the cleanest and most modern finish, especially if the existing skirting is outdated or in poor condition.
- Cons:
- This is usually the most expensive option, as it involves purchasing new skirting and additional labor for removal and installation.
- Adds extra steps to the project, as you’ll need to remove, install, and possibly paint or finish the new skirting.
Summary of Options
| Option | Description | Pros | Cons |
|---|---|---|---|
| Leave Skirting, Add Beading | Keep skirting, add beading/quarter round | Time-saving, cost-effective | Adds extra molding layer, can reduce visual space |
| Remove and Reinstall Existing Skirting | Remove skirting, reinstall after laminate installation | Clean look, no added molding | Labor-intensive, potential risk of damage |
| Replace with New Skirting | Remove old skirting, install new skirting | Fresh, modern look; ideal for updating decor | More expensive, additional steps required |
Final Recommendation
- If your existing skirting is in good condition and you’re looking for an easier installation, leaving the skirting and adding beading or quarter round is a practical choice.
- For a cleaner finish and if you don’t mind extra work, removing and reinstalling the existing skirting or replacing it with new skirting is ideal.
Each option offers its benefits, so consider your budget, desired look, and willingness to take on extra labor to choose the best approach for your laminate flooring installation.
Q - Where to use Quarter Rounds
Quarter rounds are commonly used with laminate flooring to cover the expansion gap between the floor and the wall or other vertical surfaces. Here’s where and how quarter rounds can be used effectively with laminate flooring:
1. Along Baseboards (Skirting)
- Primary Purpose: Quarter rounds are most commonly installed along the baseboards or skirting boards to cover the expansion gap required for laminate flooring. Laminate floors need this gap to allow for natural expansion and contraction due to temperature and humidity changes.
- Installation: After the laminate is installed, quarter rounds are placed along the perimeter where the laminate meets the baseboard, creating a smooth transition and hiding any gaps.
- Aesthetic Benefit: Using quarter rounds helps achieve a polished, finished look without the need to remove existing baseboards. They blend well with both modern and traditional decor.
2. Around Door Frames and Doorways
- Purpose: When laminate flooring is installed near door frames or in doorways, an expansion gap is still needed. Quarter rounds provide a neat way to cover this gap where the floor meets the door trim or frame.
- Installation: The quarter round is cut to fit precisely around door frames, ensuring a clean transition from one room to another.
- Benefit: This method is much easier and more affordable than modifying the door frame, and it keeps the floor secure.
3. Around Kitchen Cabinets and Fixed Objects
- Purpose: In kitchens, quarter rounds can be used along the base of fixed cabinets to cover the expansion gap and create a seamless look. They are also used around built-in furniture or pillars.
- Installation: The quarter round is fitted tightly against the base of the cabinets or other fixed objects, matching the existing trim color or style if desired.
- Benefit: It hides gaps while maintaining the required expansion space, preventing buckling or warping in moisture-prone areas like kitchens.
4. Along Staircase Edges or Raised Platforms
- Purpose: If laminate flooring meets a stair edge or raised platform, quarter rounds can help transition the flooring neatly. They cover any expansion gap and provide a finished edge.
- Installation: Quarter rounds are placed along the exposed edge where the flooring meets the step or platform, creating a clean look and preventing any visible gaps.
- Safety and Aesthetic Benefit: It provides a safer, finished edge and enhances the appearance of the floor near staircases or raised sections.
5. Around Built-In Fixtures or Fireplace Hearths
- Purpose: For built-in fixtures like fireplaces or columns, quarter rounds help cover gaps around the fixture where the laminate flooring ends.
- Installation: The quarter round is installed around the base of the fixture, covering the expansion gap and providing a seamless finish.
- Benefit: This approach maintains a polished look around architectural features, making the transition from floor to fixture smooth.
Summary of Where to Use Quarter Rounds with Laminate Flooring
| Area | Purpose of Quarter Round | Benefit |
|---|---|---|
| Along Baseboards | Covers the expansion gap between floor and wall | Polished look without removing baseboards |
| Around Door Frames | Hides gaps around door frames and trim | Clean, seamless transition between rooms |
| Kitchen Cabinets | Covers expansion gap at cabinet bases | Neat look; prevents moisture-related issues |
| Staircase Edges | Finishes edge where laminate meets stairs/platforms | Safe, finished edge with hidden expansion gap |
| Around Built-In Fixtures | Provides a clean finish around fireplaces and columns | Smooth transition around architectural features |
Final Note
Quarter rounds are an essential finishing touch for laminate flooring installations, covering expansion gaps and enhancing the floor’s appearance around baseboards, door frames, cabinets, and other fixtures. They provide both aesthetic and functional benefits, ensuring that the flooring has room to expand and contract without gaps being visible.
Q - DIY - How to install laminated flooring
Installing laminate flooring is a manageable DIY project, especially with modern click-lock systems. However, it’s important to follow the manufacturer’s specifications included in the box or available for download on the product page. Here’s a step-by-step guide on how to install laminate flooring, ensuring you adhere to manufacturer recommendations for a successful and long-lasting installation.
Tools and Materials You’ll Need
- Laminate flooring planks
- Underlayment (if not pre-attached)
- Spacers
- Tape measure
- Utility knife
- Rubber mallet
- Tapping block
- Pull bar
- Pencil and square
- Jigsaw or laminate cutter (for cutting planks)
Step 1: Prepare the Subfloor
- Clean the Subfloor: Ensure the subfloor is clean, dry, and free of debris. Dirt or uneven surfaces can cause problems with the installation.
- Check for Level: The subfloor should be level within 3 mm across 1 meter. Use leveling compound if necessary to fill any low spots.
- Moisture Barrier: If installing over concrete or in a moisture-prone area, lay a moisture barrier as per the manufacturer’s guidelines.
Step 2: Lay the Underlayment
- Underlayment Requirement: Follow the manufacturer’s instructions regarding underlayment. Some laminates have pre-attached underlay, but if not, install an underlayment according to the product specifications.
- Roll Out the Underlayment: Roll it out across the subfloor, making sure each section butts against the next without overlapping. Tape the seams together if recommended by the manufacturer.
Step 3: Acclimate the Flooring
- Allow Acclimation: Let the laminate planks sit in the room for 48 hours to acclimate to the room’s temperature and humidity.
- Follow Manufacturer’s Guidance: Refer to the manufacturer’s instructions for the specific acclimation time and conditions.
Step 4: Plan Your Layout
- Measure the Room: Measure the room to determine the layout and direction of the planks. Most installations look best when planks run parallel to the longest wall or the main light source.
- Calculate Rows: Plan to have at least a 30 cm stagger between end joints in adjacent rows. Avoid small cuts at the ends by adjusting the first and last rows if necessary.
Step 5: Install the First Row
- Use Spacers: Place spacers along the wall to maintain the manufacturer-recommended expansion gap (usually around 10 mm).
- Lay the First Plank: Start in a corner with the tongue side of the plank facing the wall. Lay down the first plank, pressing it against the spacers.
- Continue Across the Row: Connect each plank by angling the tongue into the groove of the previous plank and pressing down to click into place. Use a tapping block and mallet to secure each connection, as specified in the instructions.
Step 6: Install Additional Rows
- Stagger the Planks: For a natural look, stagger the end joints in each row by at least 30 cm. Cut planks as needed to start each row with an offset.
- Angle and Click: Install the next rows by angling each plank and clicking it into place according to the manufacturer’s system. Ensure each plank is tightly fitted to avoid gaps.
- Use a Pull Bar: For the last plank in each row, use a pull bar to pull it tightly against the previous plank without damaging the edge.
Step 7: Trim the Last Row
- Measure and Cut: Measure the gap for the final row, accounting for the expansion gap, and cut planks to fit as needed.
- Install the Last Row: Use a pull bar to fit the final row planks tightly against the previous row, ensuring all connections are secure.
Step 8: Remove Spacers and Install Trim
- Remove Spacers: Once the flooring is complete, remove all spacers from around the perimeter.
- Install Quarter Round or Baseboard: Attach quarter rounds or baseboards to cover the expansion gap along the walls. Do not attach the molding to the laminate itself, as it needs room to expand and contract.
Step 9: Clean and Inspect
- Wipe Down the Floor: Clean up any dust or debris created during installation using a broom or vacuum.
- Inspect for Gaps or Loose Planks: Double-check that all planks are securely locked in place and that there are no visible gaps.
Important Reminders
- Follow Manufacturer Specifications: Always refer to and follow the manufacturer’s specifications in the box or download them from the product page. These instructions are tailored for the specific flooring product, ensuring compatibility and preserving any warranties.
- Check for Additional Requirements: Some manufacturers may have specific requirements for subfloor moisture levels, underlayment types, or installation tools. Adhering to these details is essential for warranty protection.
By following these steps and the manufacturer’s instructions, you can achieve a professional-looking laminate floor that is secure, durable, and attractive

Shop All Laminated Flooring Product

Read more about Laminate Flooring Constrution and Info

Showing 1–8 of 26 results
-

AGT Bella Neo 8mm Laminate Flooring
Price range: R244.00 through R251.00 m2 -
AGT Natura Line 8mm Laminate Flooring
Price range: R270.00 through R283.00 m2 -
AGT Armonia Large Width 8mm Laminate Flooring
R296.00 m2 -
Authentic Herringbone Finfloor Laminate Flooring
Price range: R484.00 through R512.00 m2 -
Black Forest Plus 12mm AC5 Finfloor Laminate Floor
R578.00 m2 -
Classen Home 8mm Laminate Flooring
R301.00 m2 -
Classen Solido Elite and Extra 8mm Laminate Flooring
R301.00 m2 -
Classen Manor Herringbone 8mm Laminate Flooring
R500.00 m2


